Count down to Christmas with a DIY light-up paper cup advent calendar that doubles as a Christmas decoration. Kids of any age will love it—adults too, for that matter. I made this one especially for my teen daughters last year.
You might also like our Printable Christmas Papercraft Collection
Advent is so fun for kids!
What we choose to put in them isn’t the important part. It’s all about the surprise and counting down to one of the most exciting days of the year.
I make a DIY advent each year for my girls. They might be teens, but that doesn’t mean Christmas needs to be less fun.
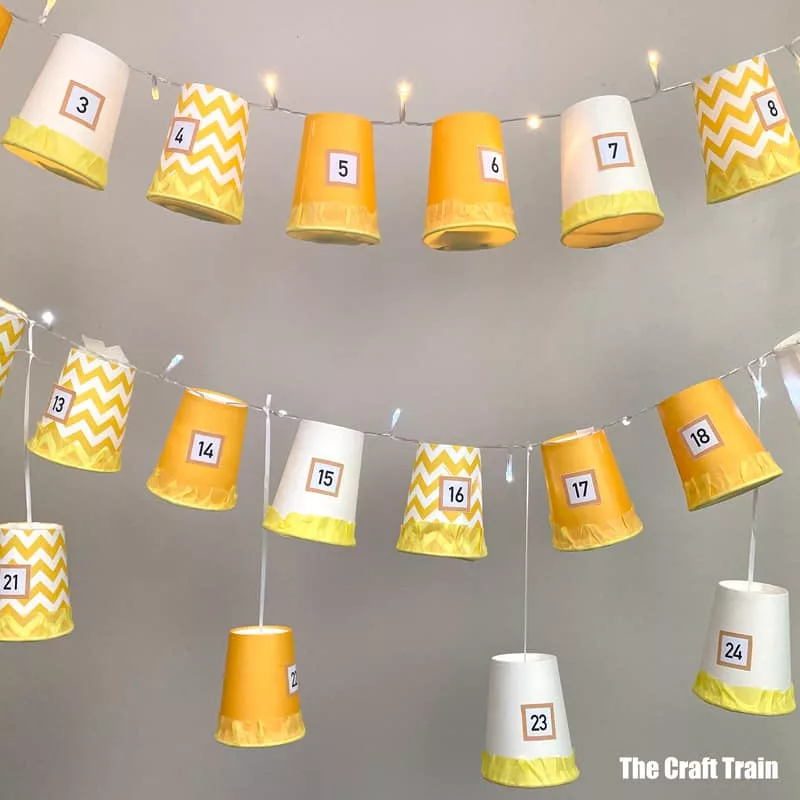
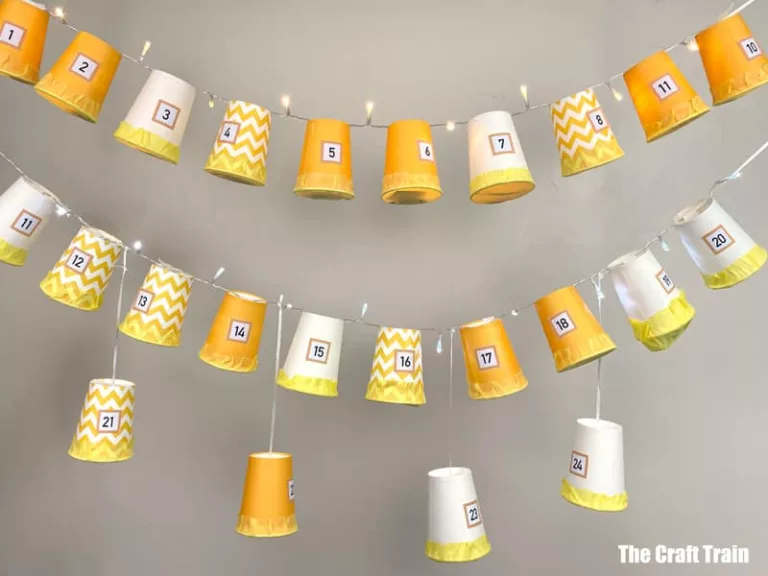
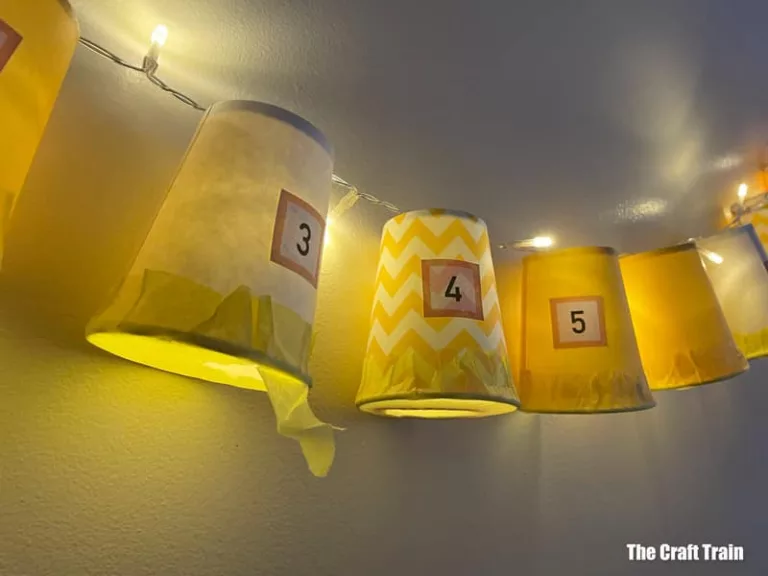
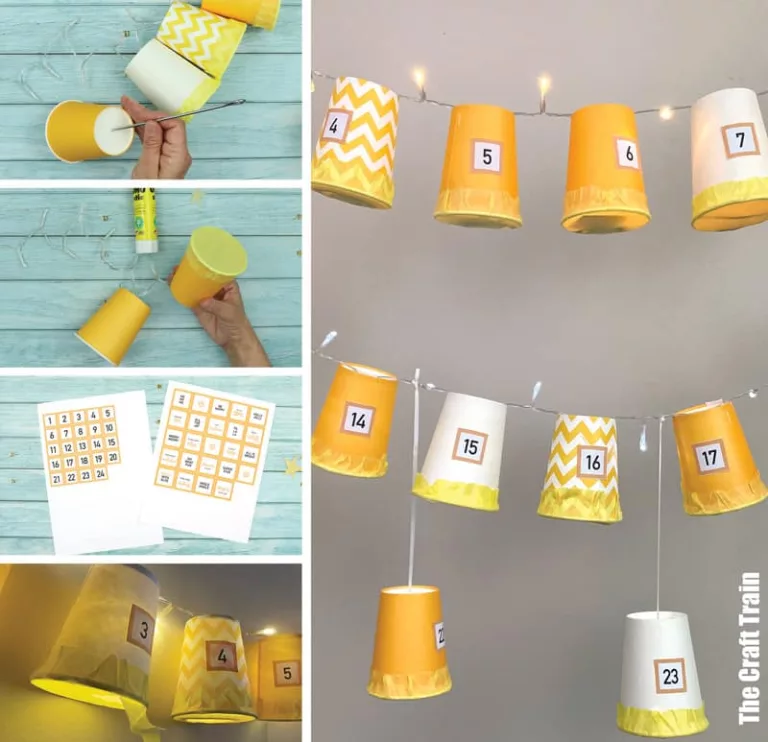
They loved this paper cup calendar, strung on cheap LED battery-operated Christmas lights. Each paper cup has a light inside it so the parcels light up. It looked pretty, but was tricky to photograph so these pics don’t do it justice.
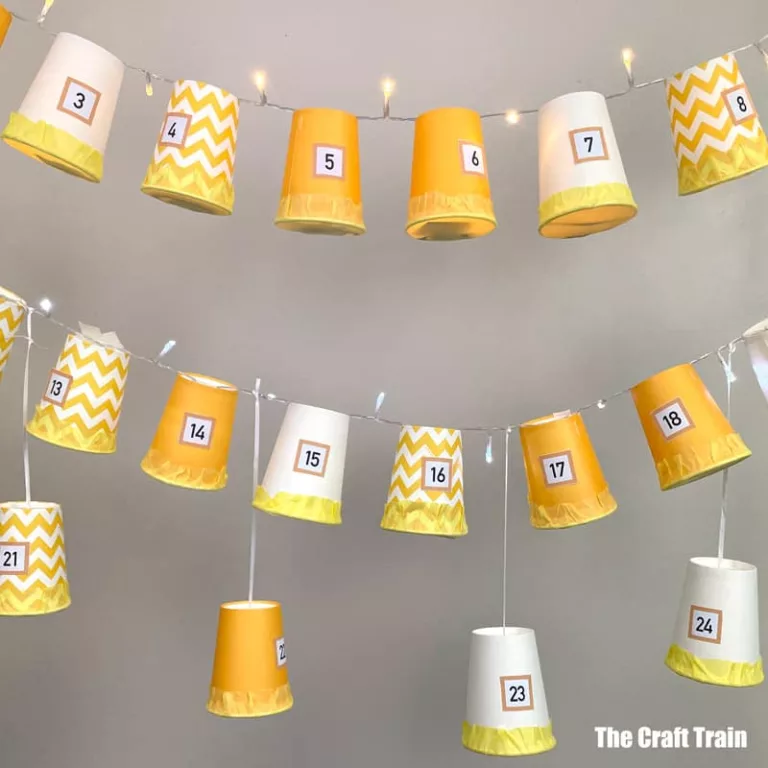
For the hero shot (above), I strung the finished calendar between two photography stands so I could get the entire calendar in one photo. For practical purposes, I strung it on picture hooks in our hallway that usually hold frames in a row. We had one string of paper cup lights running down each side of the hall.
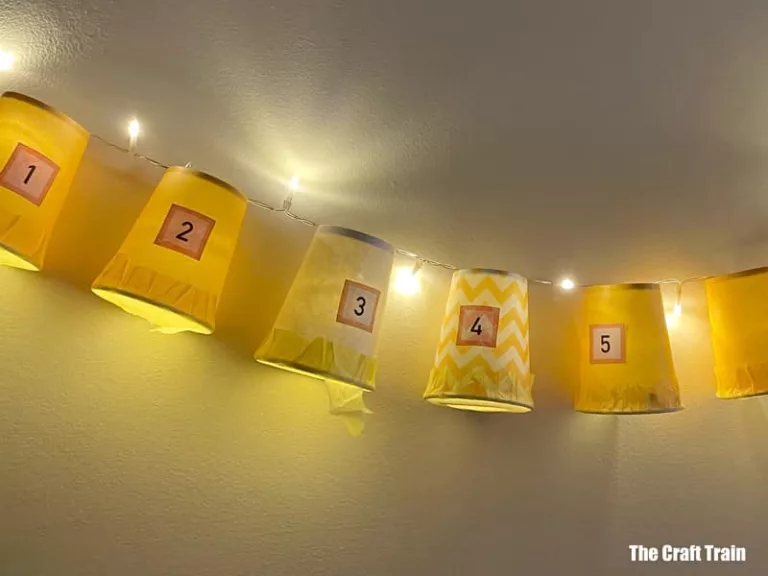
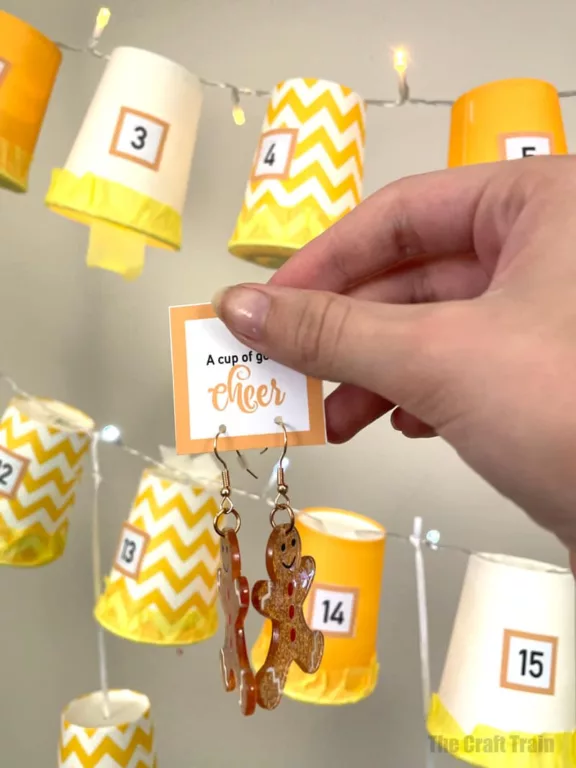
Tissue paper has been glued over the cup ends. To get the surprise you tear into it. When the calendar is lit up, you can see the silhouette of the surprises inside which gives kids a clue for guessing what’s in them, haha. I didn’t plan that part!
I used 2 strands of LED lights with 20 lights each (I bought them from Kmart but have seen similar ones in the Supermarket). Each strand of 20 lights supports 10 paper cup parcels, so I needed to suspend four of the cups by ribbon as well. You could also use a plug-in strand with more lights on it and fit the entire advent calendar on one cord, similar to this one on Amazon.
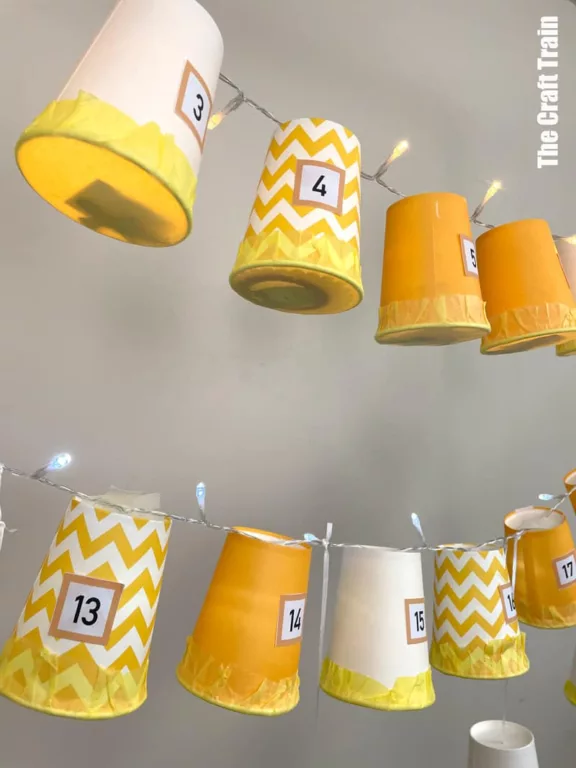
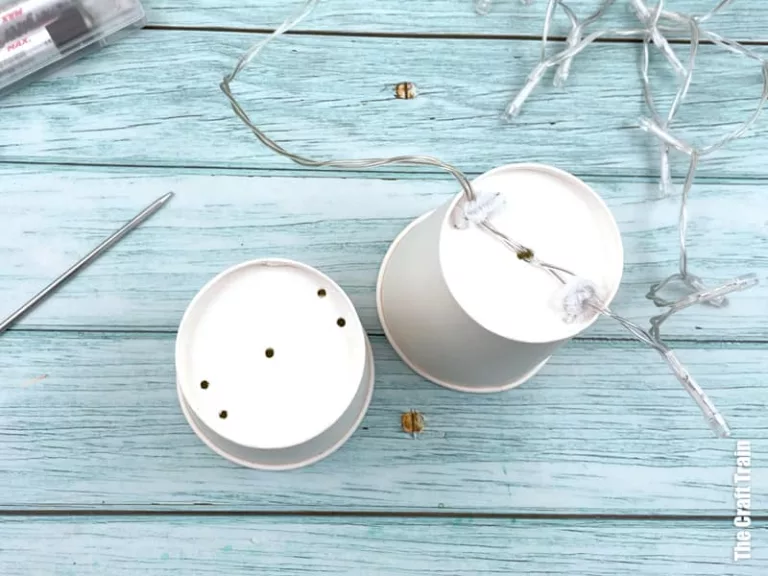
I’ve secured the cups to the lights using electrical tape, but we discovered over time that this wasn’t strong enough for the heavier parcels. You can see in the above image the tape is peeling off cup number 13. I’d recommend poking extra holes in the base and tying the lights on with a piece of pipe cleaner for this reason. I’ve included an updated photo in the steps.
Also, keep the surprises light and small since the openings are hanging base down. I used Christmas earrings (you can get a pack of 10 pairs reasonably cheap at most department stores), hair ties, small nail polishes, lip gloss etc. Change the surprises to suit your kid’s interests. Mini stationery items or chocolates are always a hit too.
Want to make one? Here’s how …
How to make a Light Up Paper Cup Advent Calendar
You will need
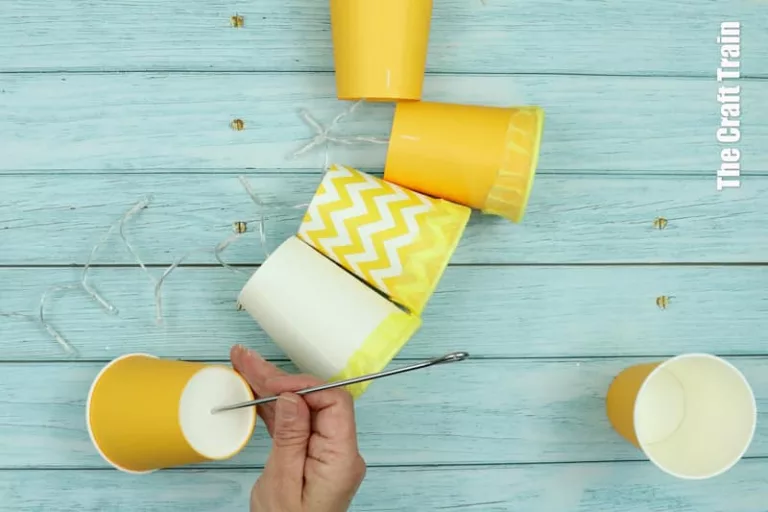
- 24 Paper cups in a colour or pattern combination to suit your taste.
- LED fairy lights with pointed ends and a clear or white cord.
- Tissue wrap in a colour that matches your colour scheme
- Glue stick
- 24 small surprises to put in each parcel
- Pipe cleaner
- Curling ribbon (if you don’t have enough lights and need to suspend some of the parcels)
- Skewer to poke holes
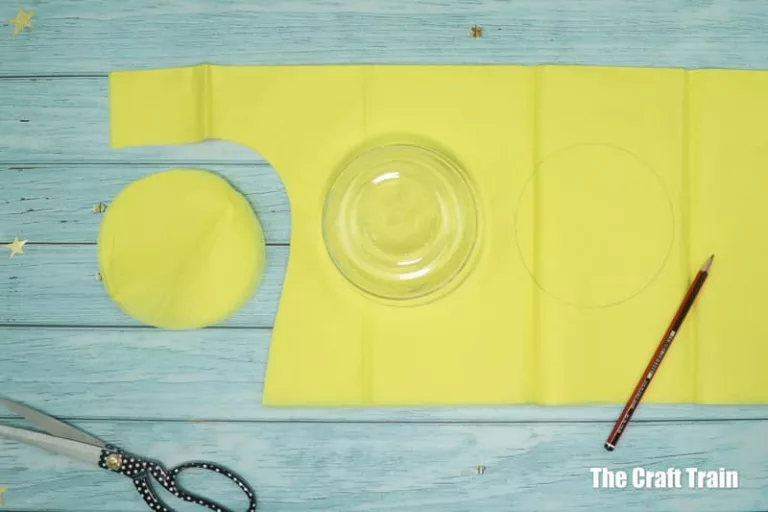
- A compass or something round to trace around (approximately 2cm or 3/4″ wider in radius the rim of your paper cup). I used a small glass bowl.
- Lead pencil
- Scissors
- Hole punch and twine or string if using the optional tags
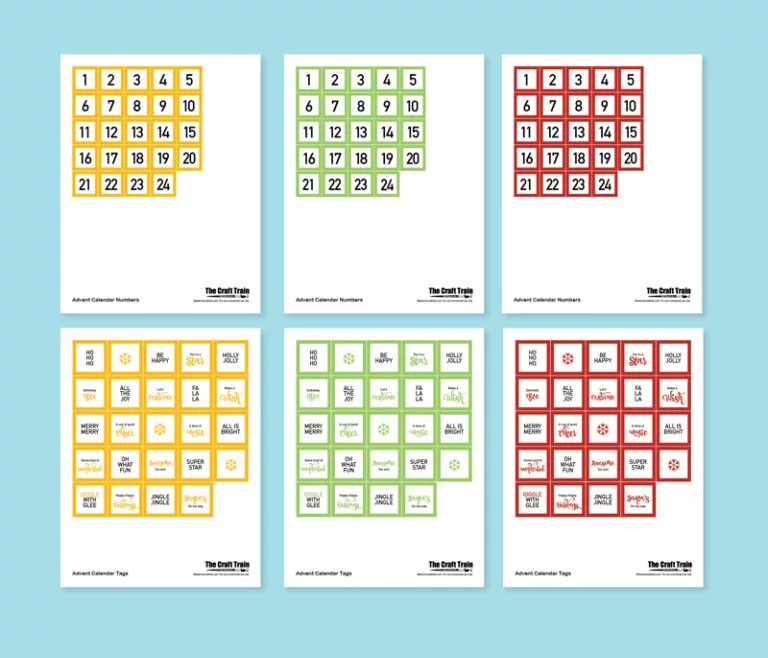
- The Printable advent numbers and tags (the tags are optional, but they work well for separating multi-packs of Christmas earrings). There are 3 colour options to choose from.
How To
Print out a set of advent numbers and tags and cut them out.
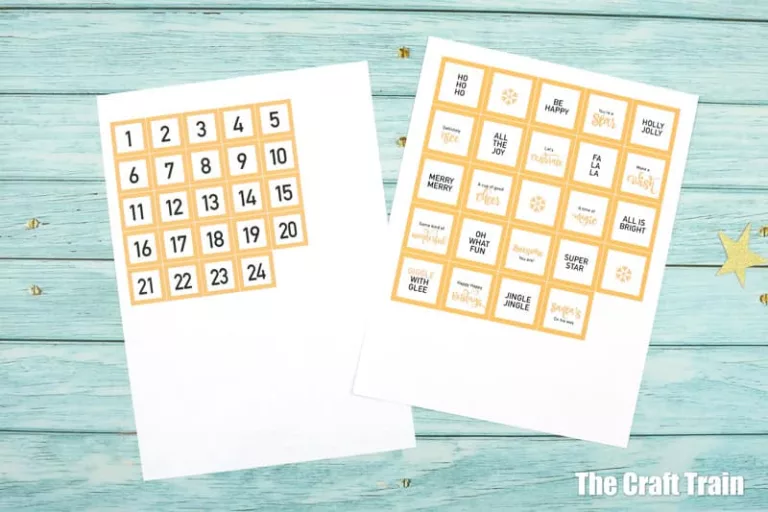
Optional – punch a hole in the corner of a tag and tie each to a surprise.

On a stack of tissue paper, trace around a round object approximately 2cm or 3/4″ wider than your paper cup rims (or you could use a compass). Cut out 24 circles this way.
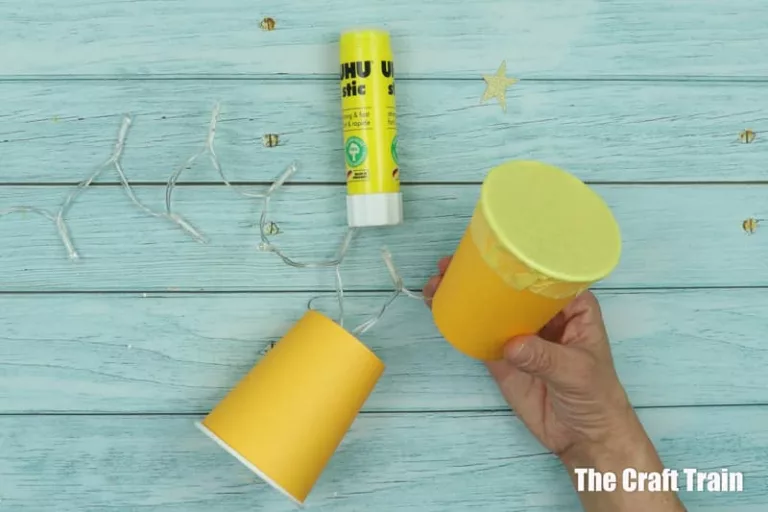
Poke a hole in the centre of each cup and two holes near the edges on each side. Push a light into the middle hole and secure each side of the cable with a small piece of pipe cleaner.
Fill the string of lights with cups, alternating with colours to suit your pattern. Leave a bulb uncovered between each cup.
Stuff a surprise in each cup, then use a glue stick to glue the paper circle on.

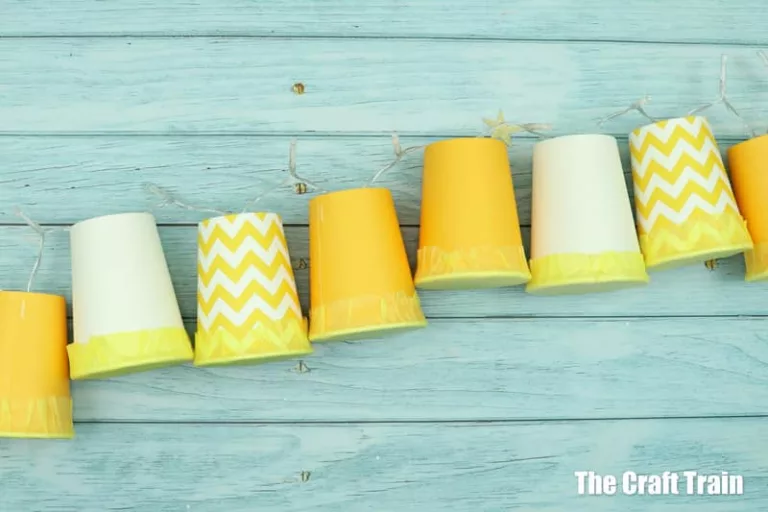
Stick the numbers onto the cups in order.
Find somewhere to hang your light-up calendar. Ours are suspended between picture hooks.
From the 1st of December, punch a hole in the corresponding day in your countdown and remove the surprise.
Happy holiday season to all our readers and their families.
More advent calendar ideas for kids
- Make a paper Christmas tree with colouring baubles to glue on each day of the countdown
- Here’s an easy Advent Drawing Prompt Calendar
- We made this gorgeous Advent Tree when my kids were preschoolers
- Use paper bags for a quick and easy DIY advent