

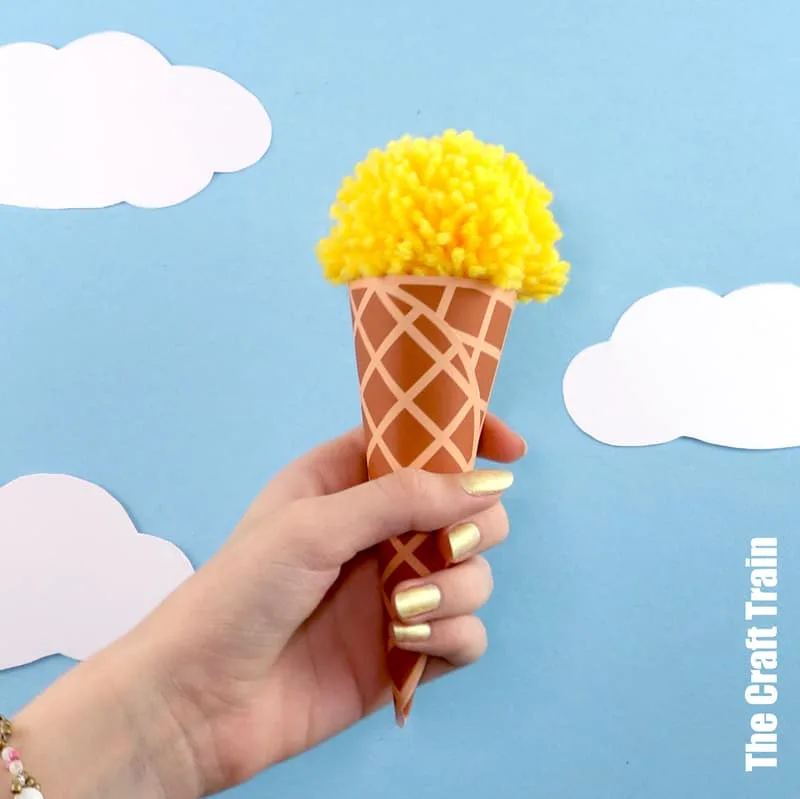
This pom pom ice cream ball and cup game makes a cool summer-themed DIY toy. It’s quick and easy to make and lots of fun too.
You might also like our 3D Ice Cream Craft

If you’re a regular reader, you know we love pom pom crafts here at The Craft Train!
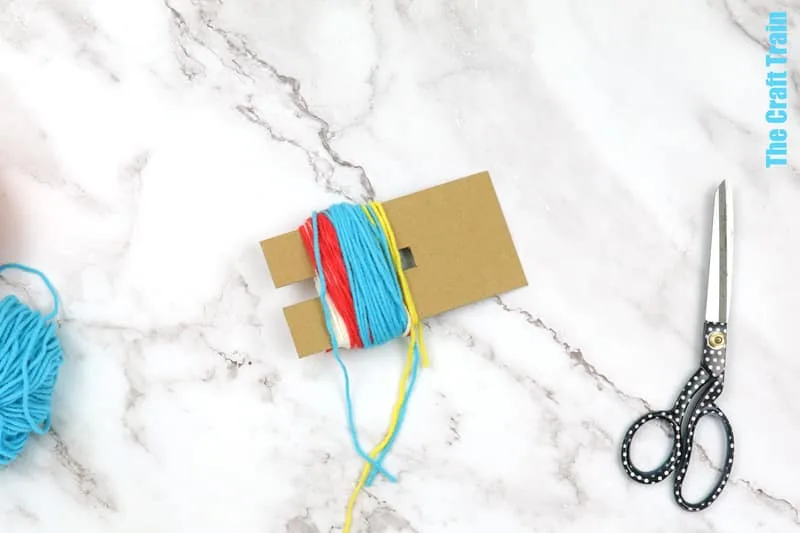
We have loads of pom pom animals in our archives, all created using the same DIY cardboard pom pom maker I’ve used for this project. I’ll go over it again briefly below, but you can find a more detailed pom pom making tutorial with video here.
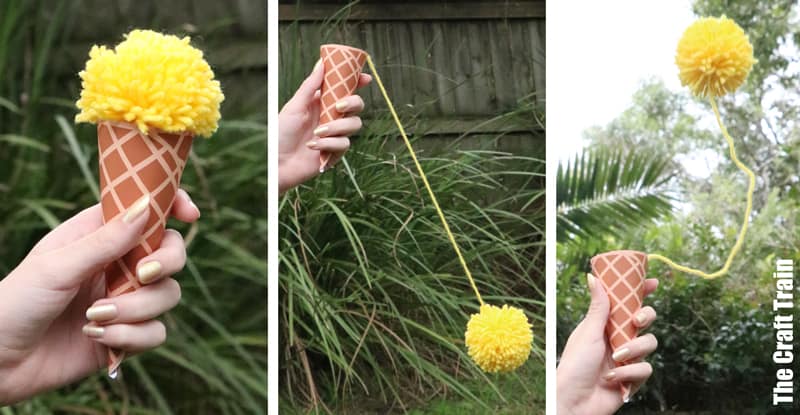
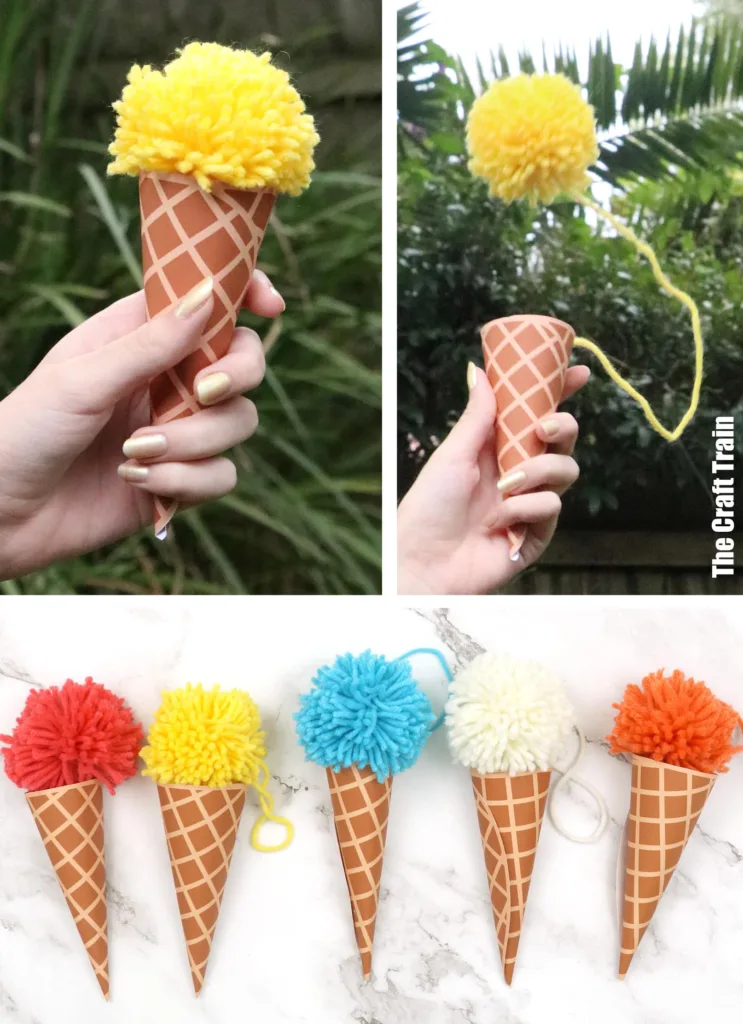
This pom pom ice cream game is based on the classic wooden ball and cup toy kids played with a century ago, long before screens were invented. It takes some coordination and practice.
My teen daughter gave a quick demo so I could get some action shots. It’s trickier than it looks!
For younger kids, you could turn this craft into a pretend play ice cream shop. Leave the string element out, put the pom pom ‘scoops’ in a container and stack some cones on the side. Then design an Ice Cream store sign, make some play money and you’re set.

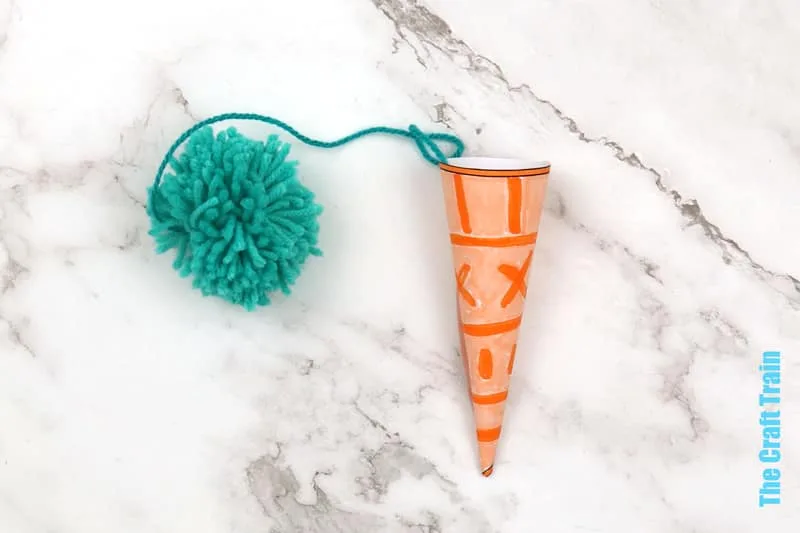
The cone template comes in full colour plus a line art version for colouring (recommended because this uses less printer ink). There’s also a blank shape so kids can get creative and design a pattern for their cone.
You only need basic everyday craft materials for this activity. Card stock is recommended for printing, but ordinary paper works too. Because you roll the paper up, this gives it extra strength to catch the pom pom.
Let’s get crafting…
How to make the Pom Pom Ice Cream Ball and Cup Game
You will need:
- Colourful Yarn – Ours is around 12 ply
- A scrap of recycled cardboard for your DIY pom pom maker
- Markers, pencils or crayons if colouring your own
- Glue stick
- Sharp scissors
- Sticky Tape
- The ice cream cone template — enter your details below for the freebie
How to
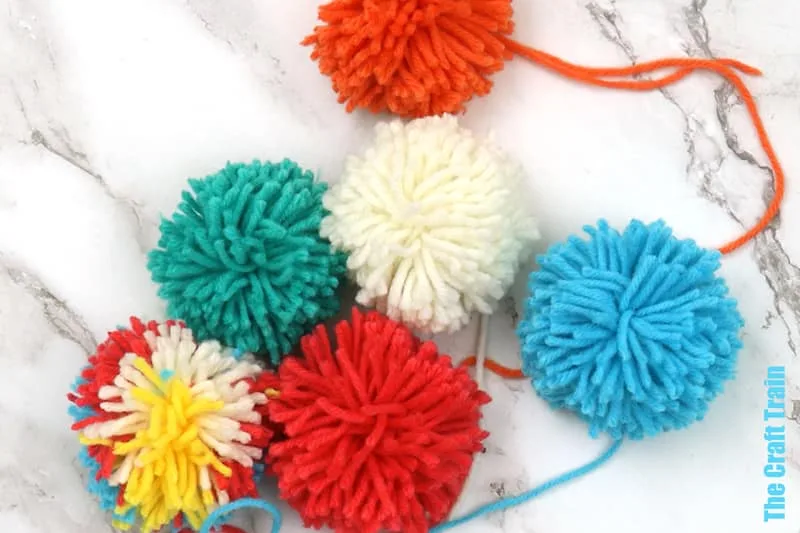
First, make the pom pom. Use the pom pom maker template shape in the download to create a medium-sized pom pom maker from scrap cardboard.

Choose some yarn in a colour that matches the flavour of ice cream you want to create and wrap it in a bundle around the pom pom maker. The thicker your yarn, the quicker it will be to make your pom pom and the fluffier it will look. The puffier your bundle, the more fluffy the pom pom too.
In this example, I’m making a bubblegum-flavoured rainbow ice cream so I needed lots of colours.
Tie the centre of the bundle firmly before sliding it off the pom pom maker. Once off, tie again with a double knot for strength, as tightly as possible. Some kids will need help with this step because it’s tricky for little hands to tie a super-tight knot.
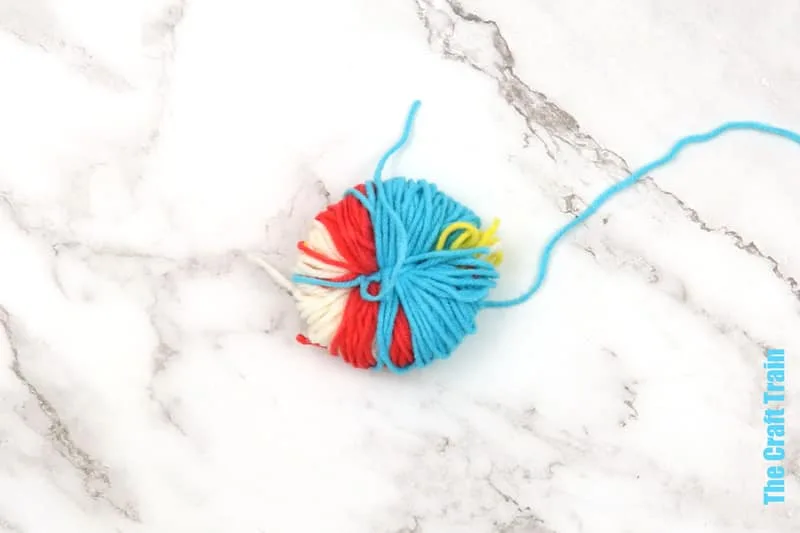
Cut the looped ends all the way around and you’ll have a very shaggy pom pom. Hold it over a sheet of paper or a waste basket and trim the ends to get it looking smooth and round.
Leave the centre string long if you can for the game, but if this gets trimmed off by accident it’s no big deal. Once you’ve trimmed your pom pom, tie another long string to the centre.
Next, make your cone. Use the full-colour version for a faster, more ‘perfect’ looking craft. Alternatively, let kids colour or design their own to get the creative juices flowing.
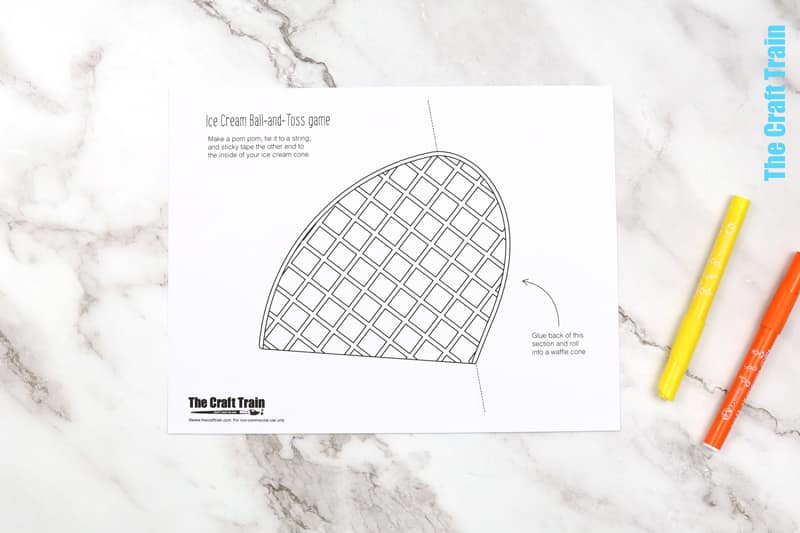
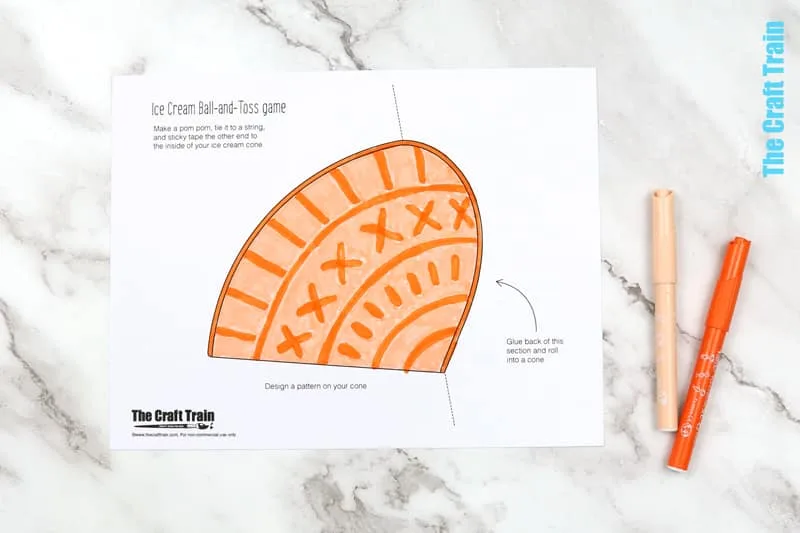
Cut the shape out.
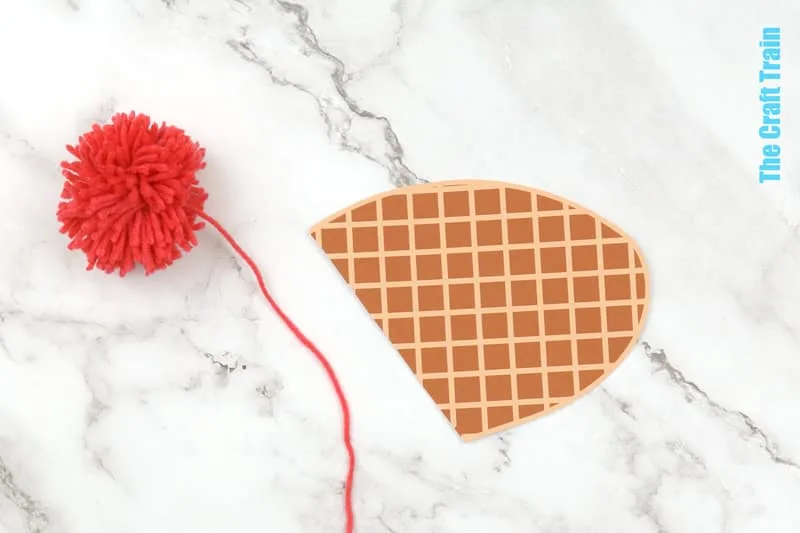
Sticky tape one end of the long string onto the reverse side of the cone down near the pointy base. Use a couple of pieces of tape to make it more secure.
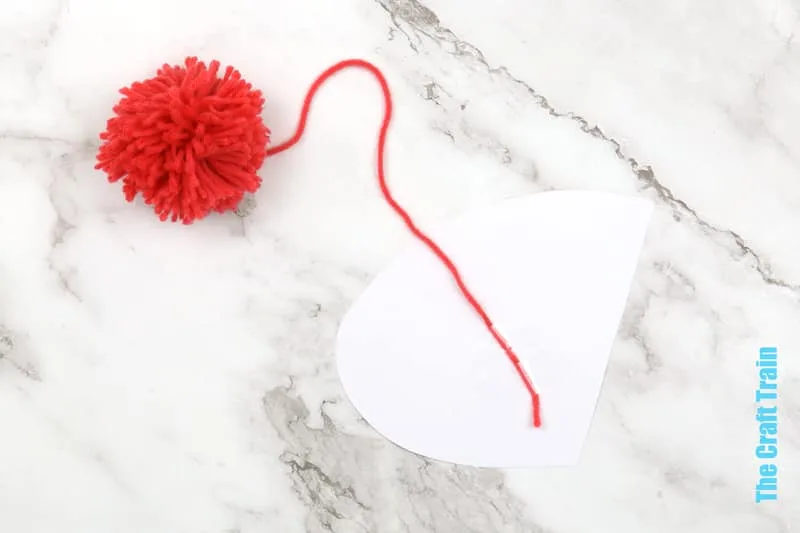
Place glue on the curved end, then roll into a cone shape.
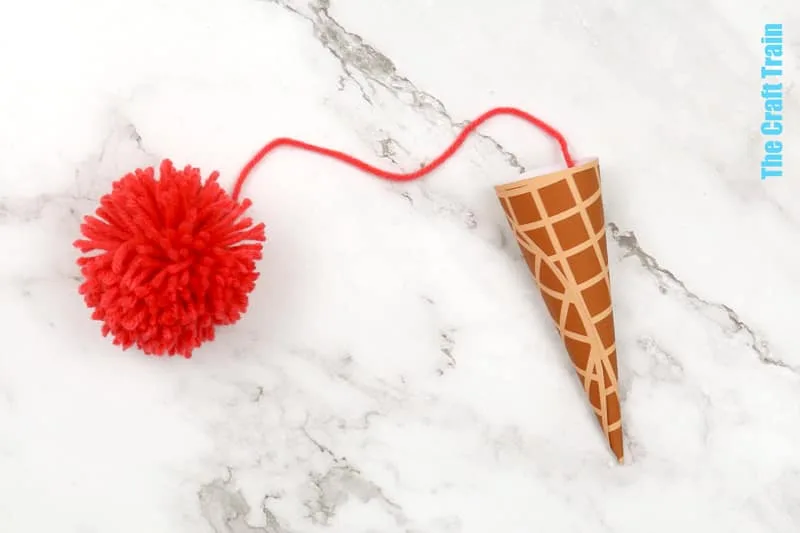
You’re done!
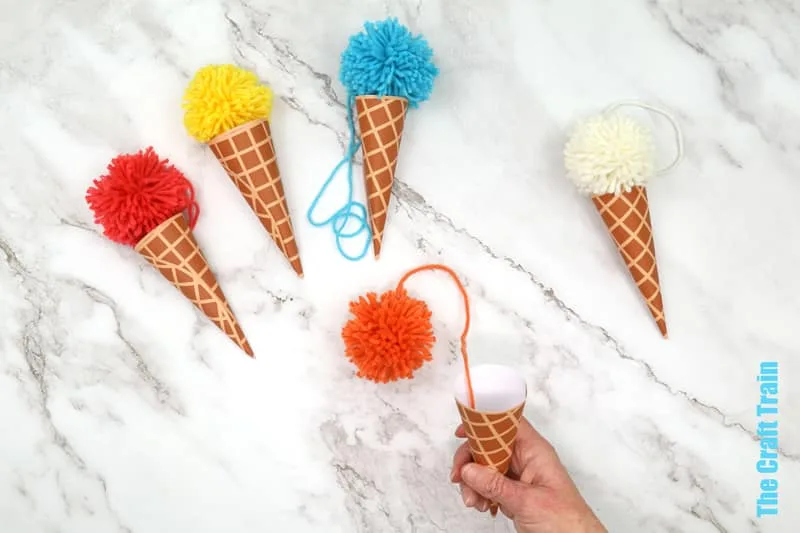
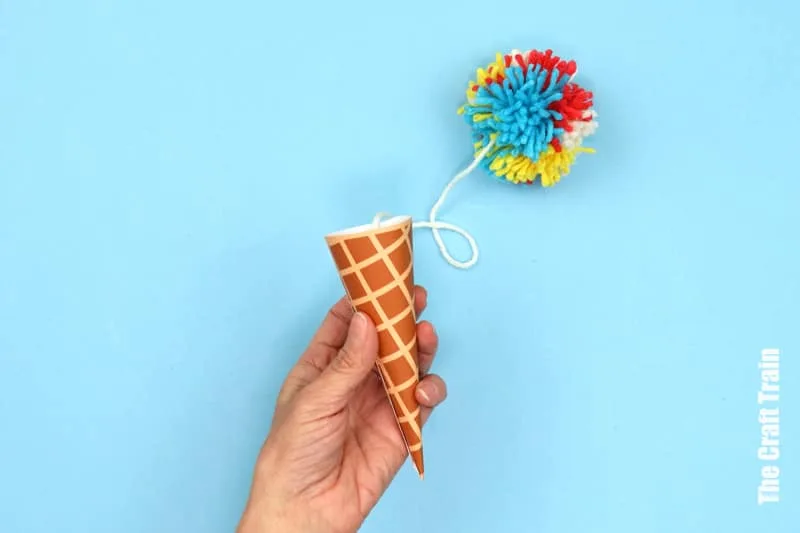
Now see how many attempts it takes to catch the ice cream in the cone. It took me at least 20, but I got the hang of it eventually.
More DIY toy ideas kids will love
- Make a twirling, whirling whirlygig using our printable pattern
- These egg carton copters are so fun to make
- Turn a cardboard box into a fairy castle for imaginary play
- Older kids will love making a pom pom flamingo marionette


Hi Sam, I’ve updated the post with a free download form so you can now get the template. Thanks for pointing this out 🙂