This eye-catching Apple Positive-Negative Art project is a great activity to celebrate back-to-school, Autumn harvest and apple season.
It’s so fun and easy to make too!

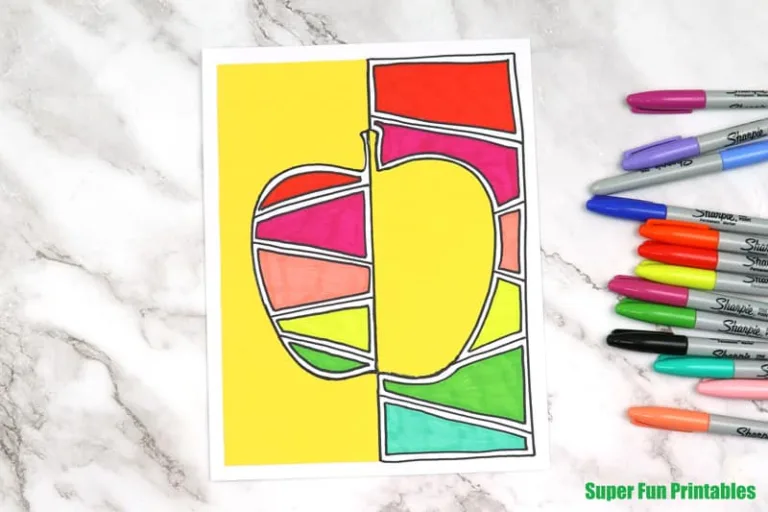
Apples are such a fun theme to craft on. This art project teaches about positive and negative space using an apple shape and invites kids to add to it with a pop of colour and pattern.
The options for kids to come up with their own patterns and designs are endless.

The age recommendation for this project is 8+ because of the patience and fine motor skills required for any doodle art. Older kids will be able to create more complex patterns.
For younger kids, this art project can be modified by using completed process art. Trace the apple positive and negative shapes onto the dry process art, then glue onto a card stock background.
Card stock is recommended for the doodle art version but paper will also work. If you use permanent markers for the patterning, they will go through thin paper and stain the surface below though.
If you need help with patterning ideas, we have a free doodle design swatch sheet.
If working with a group of kids, you can save paper by printing one apple template for every two students and cut them in half.
How to create apple positive negative pattern art
You will need
- Card stock in white for the background
- Construction paper or card stock in a bold colour to print your apple shapes on
- Markers for doodling. You can use permanent or regular kids washable markers
- Scissors
- Glue stick
- The apple positive/negative art template, available from our printables store and TPT store
How to
Print the template to card stock in a colour of your choice. Red and green work great, but you can use any colour.
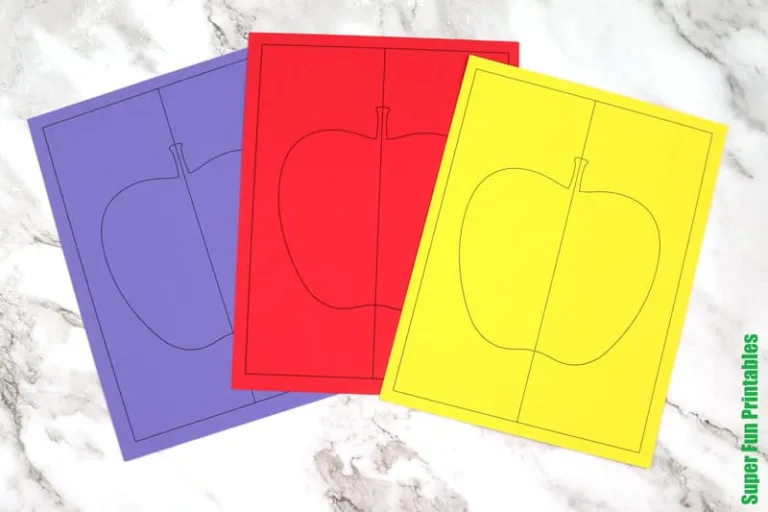
Cut the shapes out.
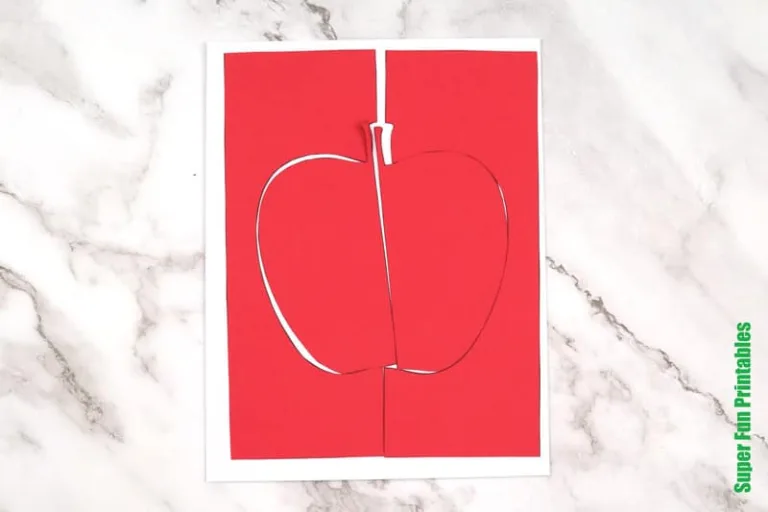
Glue one background half onto a sheet of backing card stock, leaving a white border around the edge (approximately 10mm/0.39”).
On the opposite half of the backing sheet, glue the opposing apple half so the positive and negative spaces align as shown in the example. If you’re using one template per two students, you’ll need to flip the apple half over.

Use a black marker to complete the rectangular border. I’ve drawn mine freehand with no ruler which gives it a cool contrast effect of imperfect vs perfect line. If you want the borders to have a precise edge you could get the kids to use a ruler and lead pencil to sketch the line first.
Use the black marker to draw a simple pattern of your choice. Fill all of the negative white space with the same pattern. I’ve also used the marker to trace the edges of the apple, but this was done after I coloured the pattern so you can’t see it in the photo below (it’s probably better to do it before though).

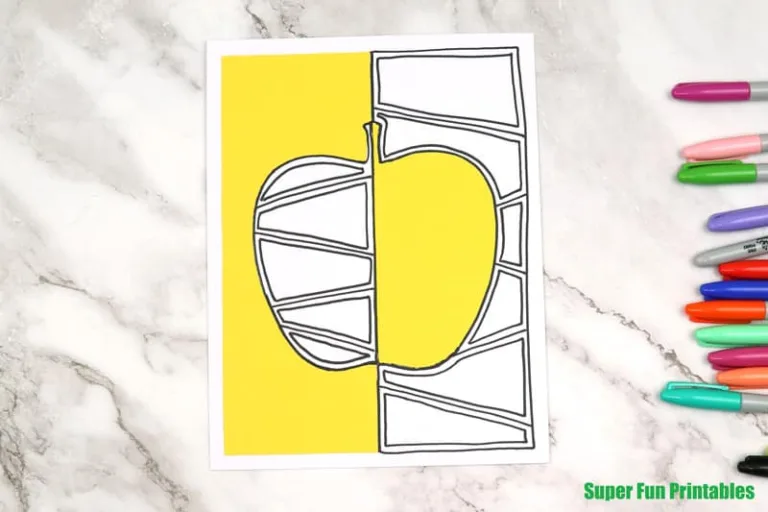
Colour the pattern in.

Now hang it on the wall to brighten your room. Multiple apple artworks together in bright colours have a cool pop art effect.

More apple crafts and activities
- Make the cutest apple treat baskets
- Use our open-ended apple template shapes for your own project ideas
- Create a paper roll apple tree with ‘pickable’ velcrose apples.
- Here are over 30 Apple crafts and activities for kids

More printable art projects for kids