This 3D pattern art turkey is so colourful and fun as a Harvest Season, Thanksgiving or Farm animal project.

Turkey crafts are super popular this time of year, especially amongst our American and Canadian readers. For everyone who celebrates Thanksgiving, this one’s for you!

I admit, I struggle with the cartoon stereotypical turkey image versus what a real-life one looks like. Real turkeys have a large wattle (often blue) that covers most of their head and beak. The part that dangles down can be quite long. It’s looks a bit like a fungi helmet.
Cartoon turkeys have heads that resemble roosters and sport a cute red wattle, usually below their beak like a little beard.
I get it. Real turkeys are ugly, but they don’t know that. They probably like the way they look.
We already have a realistic turkey treat basket craft. With our pattern art turkey, I’ve gone more cartoon-style, but his wattle’s still long one and sits on top of the bird’s beak like it should.
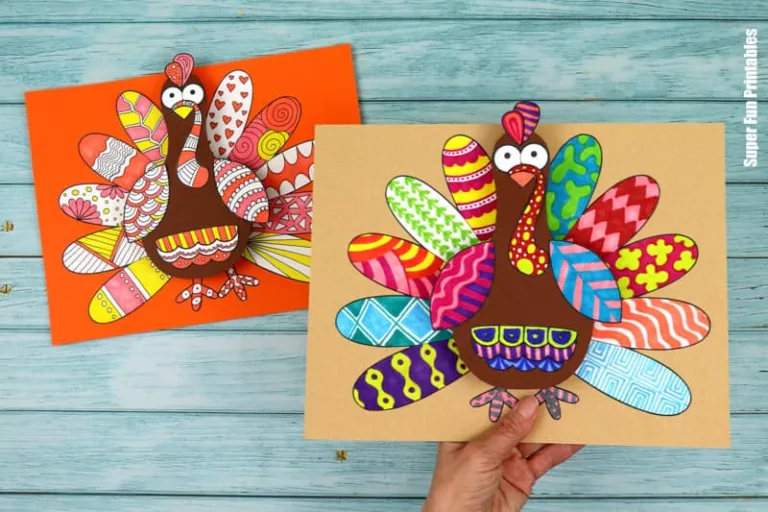
Kids can get creative and pattern the tail feathers, wings and wattle any way they like. Make the body brown or black like a real turkey, or go crazy and make it pink, green or blue.
Lets get started …
How to make a 3D Pattern Art Turkey
You will need
- Card stock in white plus two colours of your choice
- Markers – either permanent ‘sharpie’ markers or regular kids washable markers
- Scissors
- Glue stick
- The Turkey Pattern Art template, available from our printables store and our TPT store
How to
Print the turkey details and support strips to white card stock and the body shape to a colour of your choice, I’ve gone with brown. To save paper, there are two body shapes to a page so you only need one per two students.
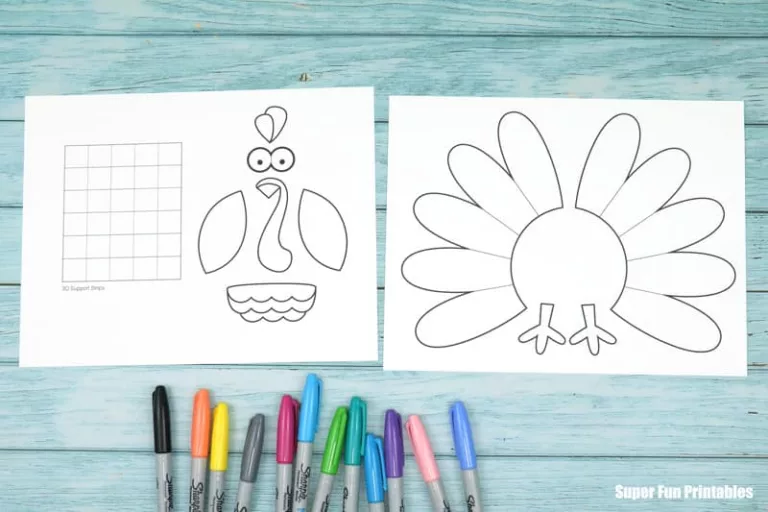
Decorate the turkey shapes and other details with doodle art patterns and colour in.
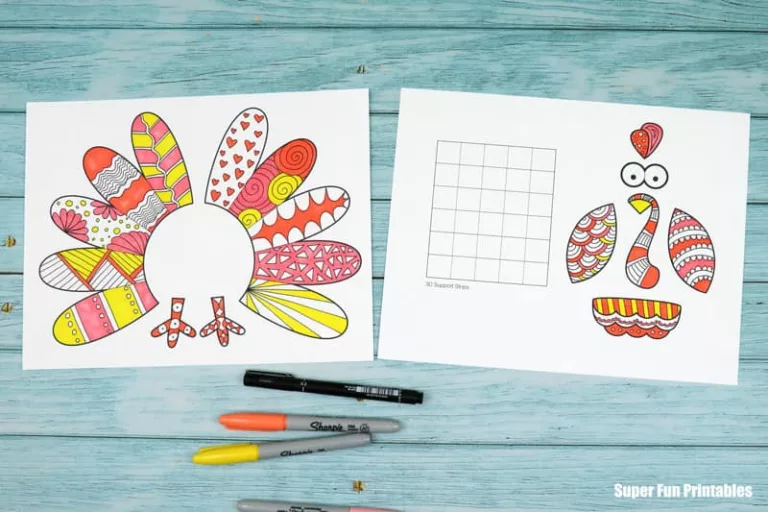
Cut the turkey body shape, tail and other details out.

Cut the support strips out, then fold and glue them into squares. For folding accuracy you can score the fold lines first using a ruler, cutting mat and scoring tool but this step is not essential.
Arrange the turkey tail and feet over a backing sheet of card stock before gluing down. Make sure that the pieces are positioned so the turkey’s body will cover the edges once it’s glued over the top. Glue in place.
Glue the turkey wings, beak, eyes, comb and stomach feathers onto on the body.

On the back of the body, glue the six support squares.
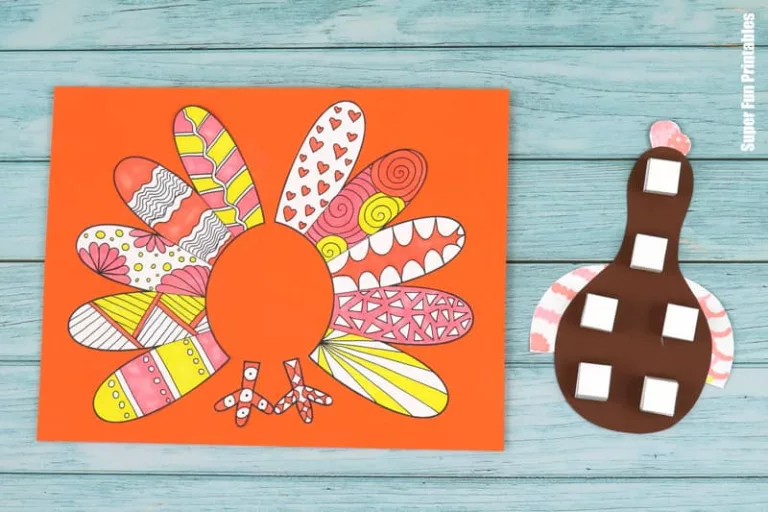
Glue the body into place over the tail and legs.

Your turkey is done—gobble gobble gobble!

Happy Thanksgiving to our American friends!

More Harevest Season Ideas for Kids
- Create adorable beaded Mini Pumpkin People
- We also have a super cute paper pumpkin village
- Here’s a printable turkey treat basket
- Make a cute fruit cup turkey snack with our printable glue-on shapes
Check out all our Autumn Printables