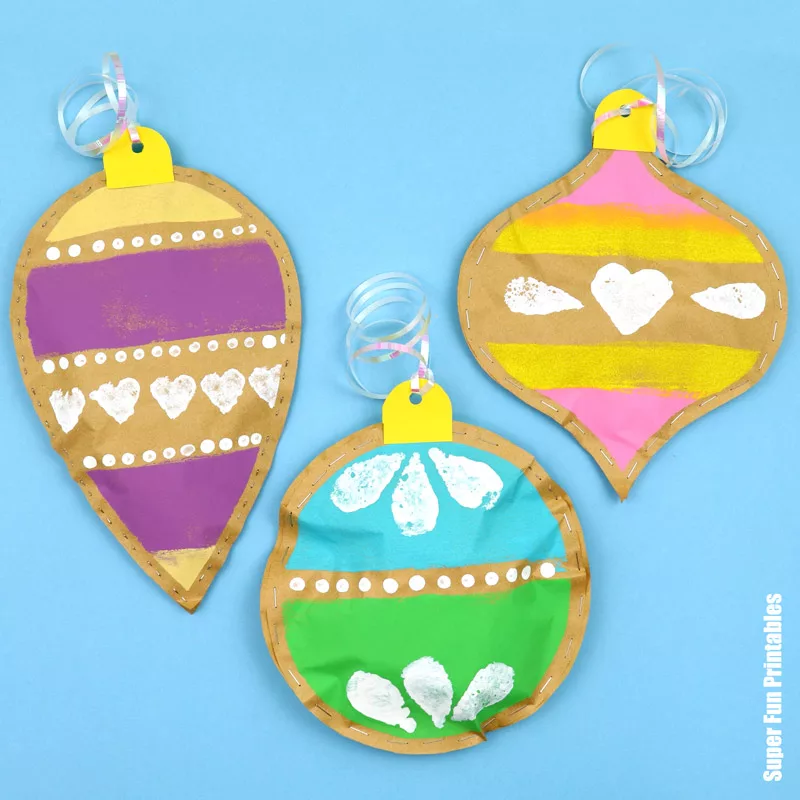
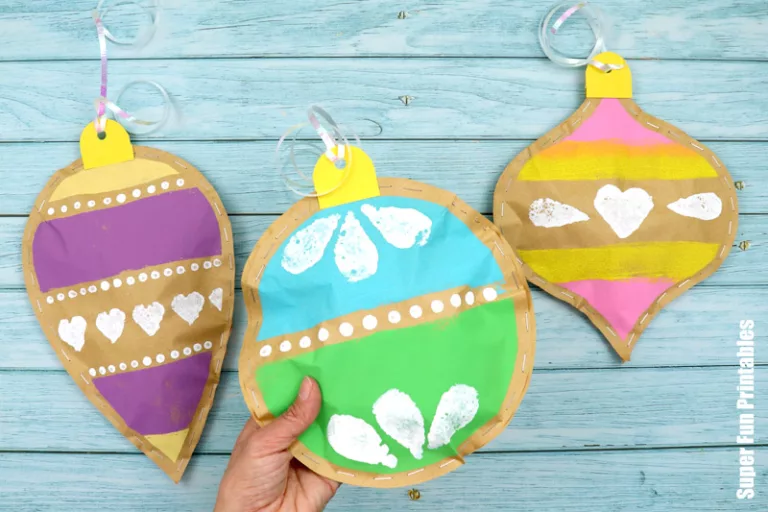
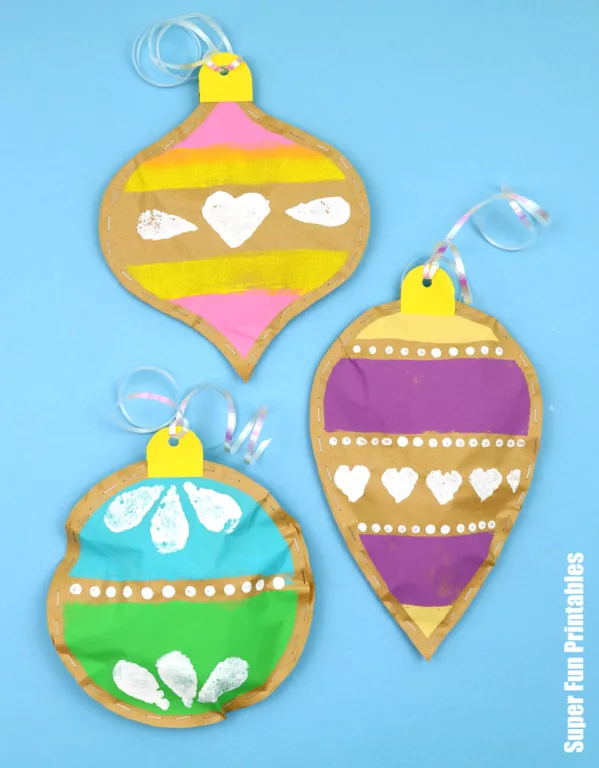
These stuffed paper baubles are soooo fun to make. They make perfect DIY gifts when filled with Christmas candy or something small. They can also be turned into recycled decorations by omitting the gift and stuffing with paper instead.

You know I love a good multi-purpose craft! Something that can be useful in addition to providing a creative activity for kids. Well, these stuffed paper baubles are a good one!
Firstly, it’s an art activity with a patterning element (patterning has STEM benefits for kids and it gives them some creative licence).
Secondly, it becomes a craft, where the art is turned into a finished product.
Thirdly, it’s a DIY gift idea. Handmade gifts are a wonderful way to teach kids about giving. Cost doesn’t mean much to younger kids, but the effort and love they put into making things do.
Last of all, it’s a cute Christmas decoration.
Four things in one—can’t beat that!
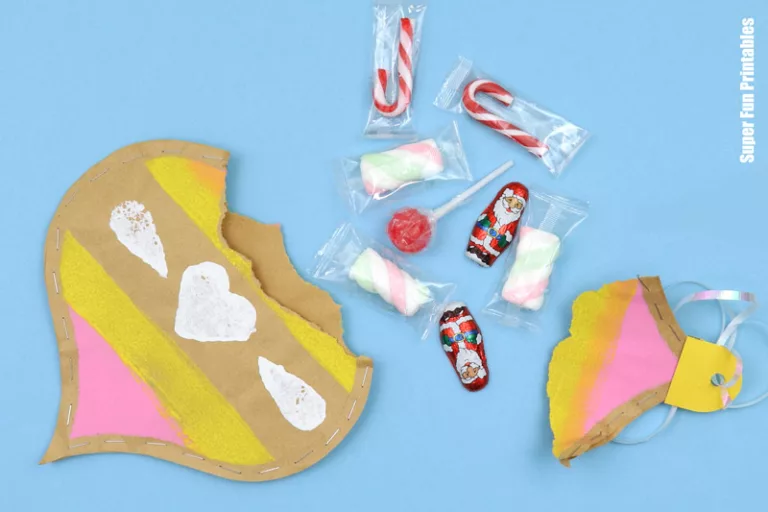
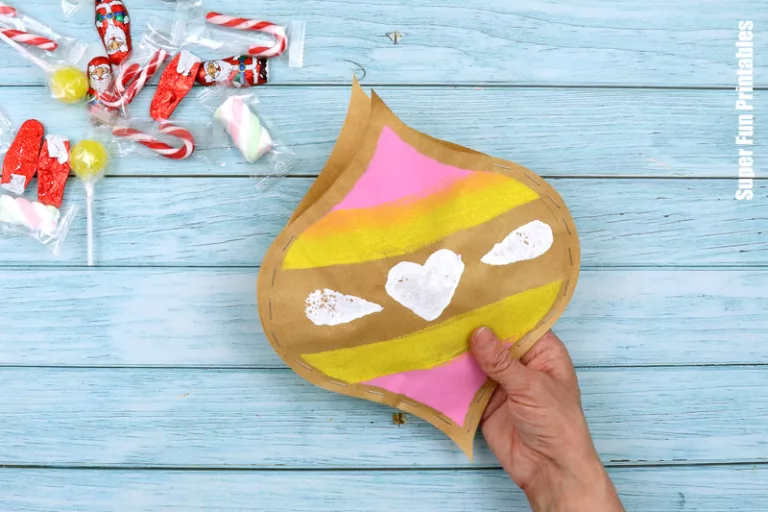
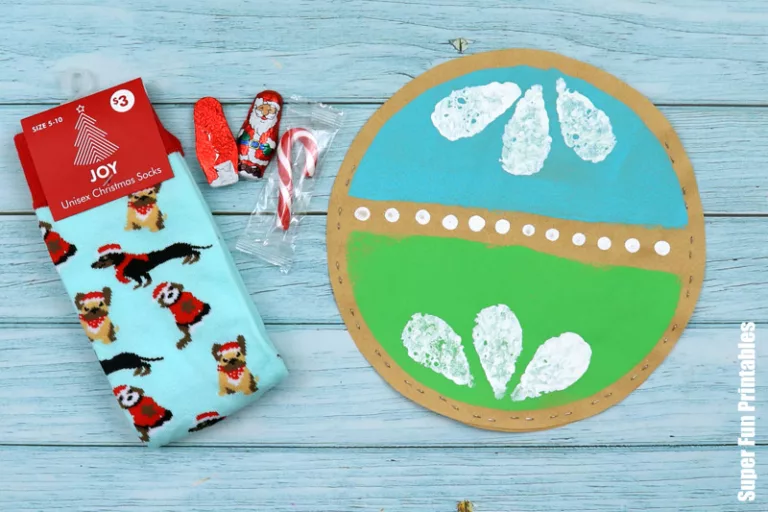
I’ve stuffed my baubles with Christmas sweets and socks, but you could switch this out for other small gift ideas like hair accessories, stationery, etc.

You can omit the gift element and turn this into a recycling craft by stuffing the baubles with newspaper instead. Substitute the kraft wrapping paper for recycled brown grocery bags (like we’ve done with this stuffed paper penguin) for an even more eco-friendly version.
A collection of kid-made, recycled baubles would make a beautiful classroom Christmas decoration if you string them across the room.
These baubles are super easy to make too, meaning this activity is suitable for ages 6 and up. Younger kids could also make them with some adult help.
I did film a video but accidentally deleted half the steps from my memory card before I saved them (boo hoo), so there are only photos for this tutorial.
Let’s get started …
How to make stuffed paper baubles
You will need
- Kraft wrapping paper or similar
- Acrylic paint
- Sponge rollers – it works well to have more than one width
- A kitchen sponge cut into stamping shapes – I cut mine into teardrop and heart shapes
- Q tips/cotton buds
- Painter’s tape
- Scissors
- Stapler
- Paper clips
- Card stock for the masking shapes and yellow card stock for the bauble ends
- Optional Christmas candy mix – or use newspaper or a small gift (like Christmas socks, stationery or hair things).
- Curling ribbon
- Hole punch
- The bauble art template, available from our printables store and TPT store
How to:
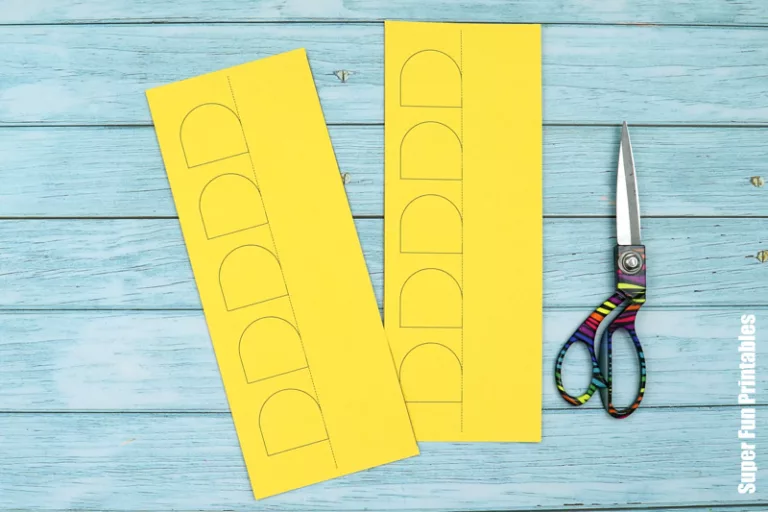
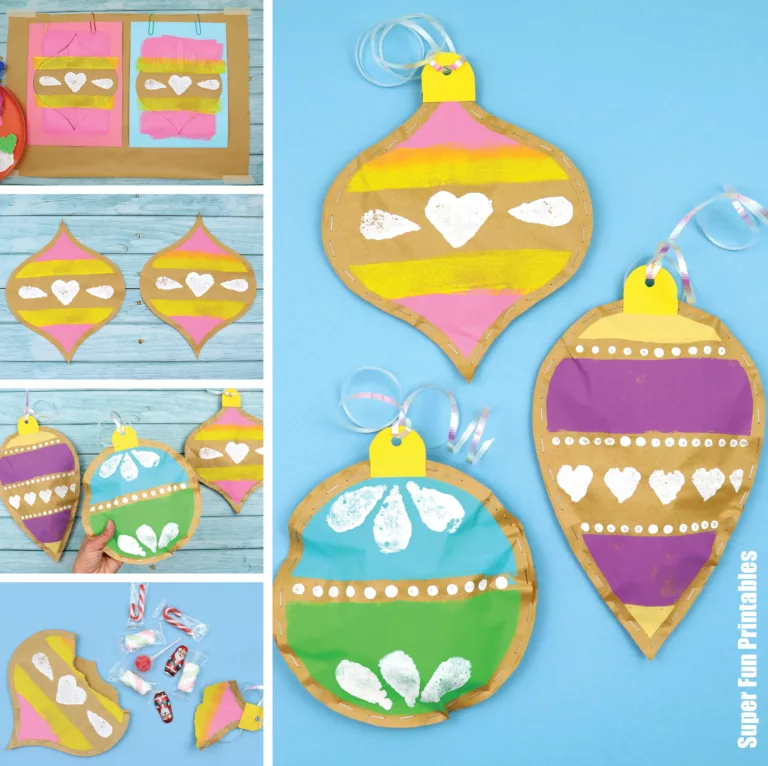
Print the bauble shapes to card stock in any colour and the bauble ends to yellow card stock. You will need two of each bauble shape you wish to make.
Fold the bauble shapes and cut along the dotted lines to create masking shapes.
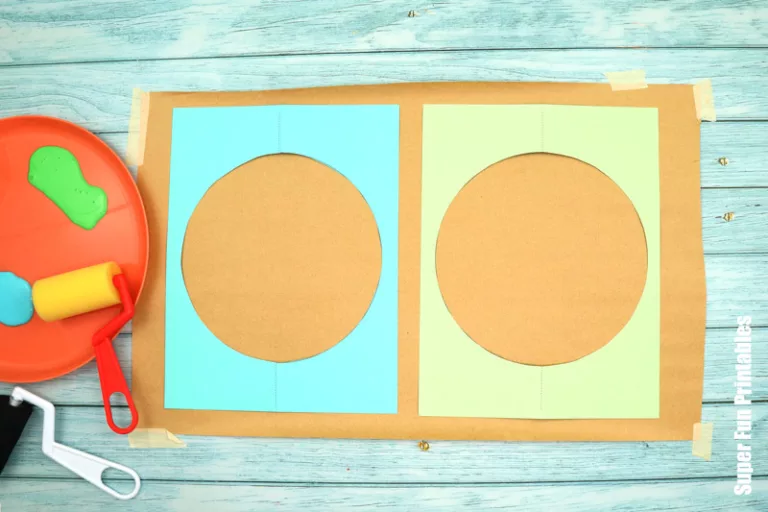
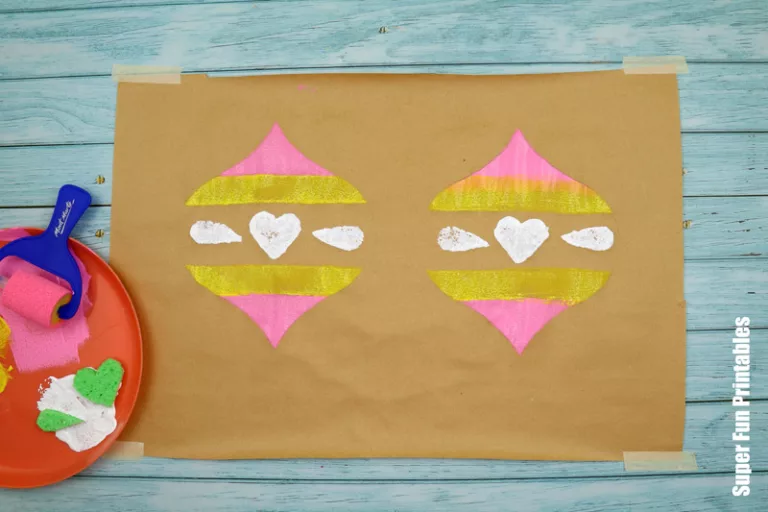
Take a piece of Kraft wrap large enough to fit two matching bauble shapes on. Stick it to the table with painter’s tape to stop it from curling, shiny side up.
Place the masking shapes over the paper and hold in place with paper clips.

Use sponge rollers, brushes and q-tips to decorate the baubles with patterns. I’ve made matching patterns on the bauble front and back, but there is no reason they can’t be different.

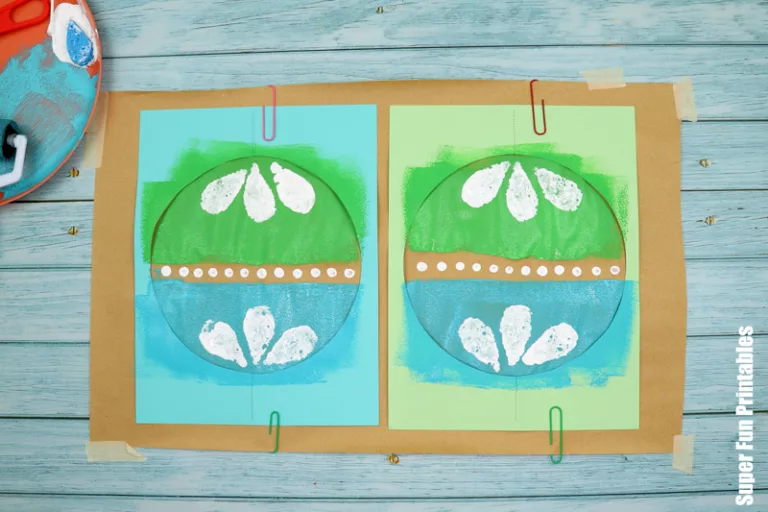
Remove the mask! Leave in place until the paint has dried or, if you need the space to make more baubles, carefully move it to another flat surface where you can tape it down (kids might need two people to accomplish this and hold the corners).
If you’ve left space in your ornament as a design element, as I’ve done withe the bauble below, trace the inside edges of the template with lead pencil before removing the mask. This will help keep your ornament’s shape.
Once dry, use a lead pencil to draw an approximate 1.25cm/0.25” border around the outside of your bauble. It’s not a big deal if it’s not super accurate because this is just to make space for the staples.
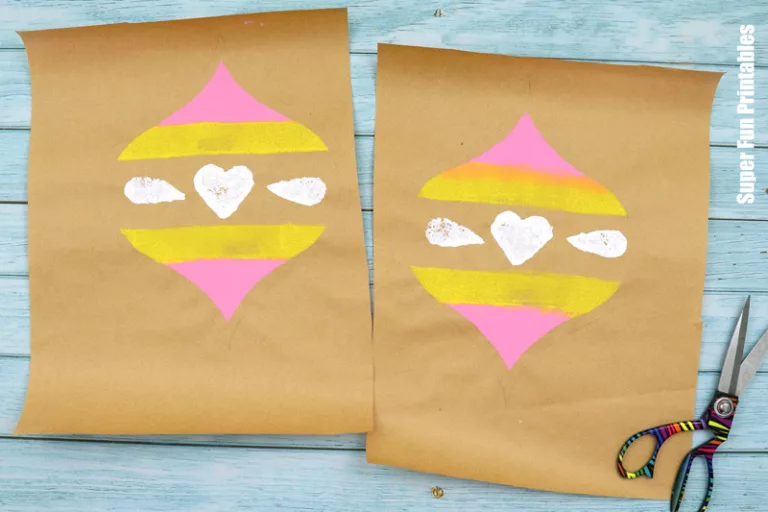
Cut the shapes out.
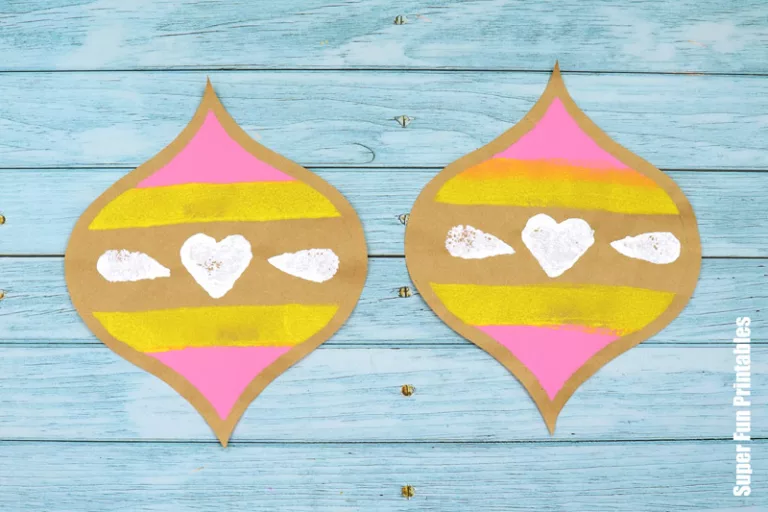
Staple the baubles together, leaving a gap at the top to stuff them. Pack the baubles with candy or newspaper (or a small gift). Staple the gap shut.
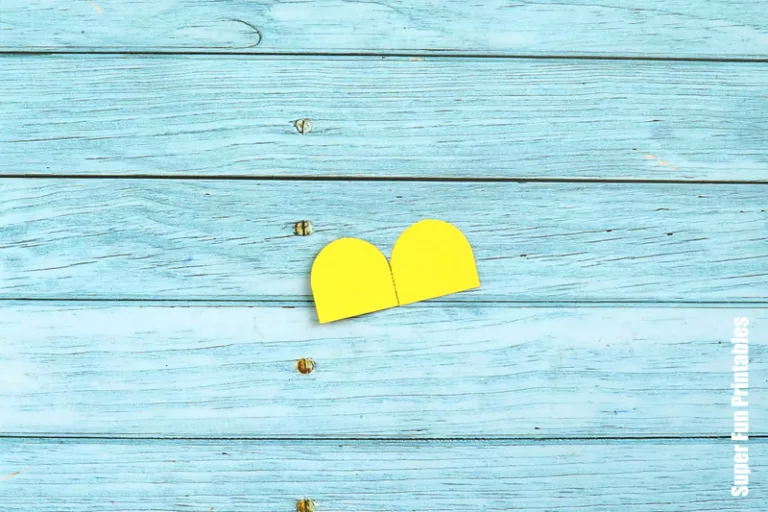
Fold the bauble end shapes along the dotted lines and cut out the shapes.
Glue onto the tops of your baubles using a glue stick. Punch a hole in the top and thread with curling ribbon.

Aren’t they gorgeous?
While my patterns look very ‘designed’, this craft would also look great with more abstract, less perfect-looking patterns.
All that’s left to do is decide who to gift it to!
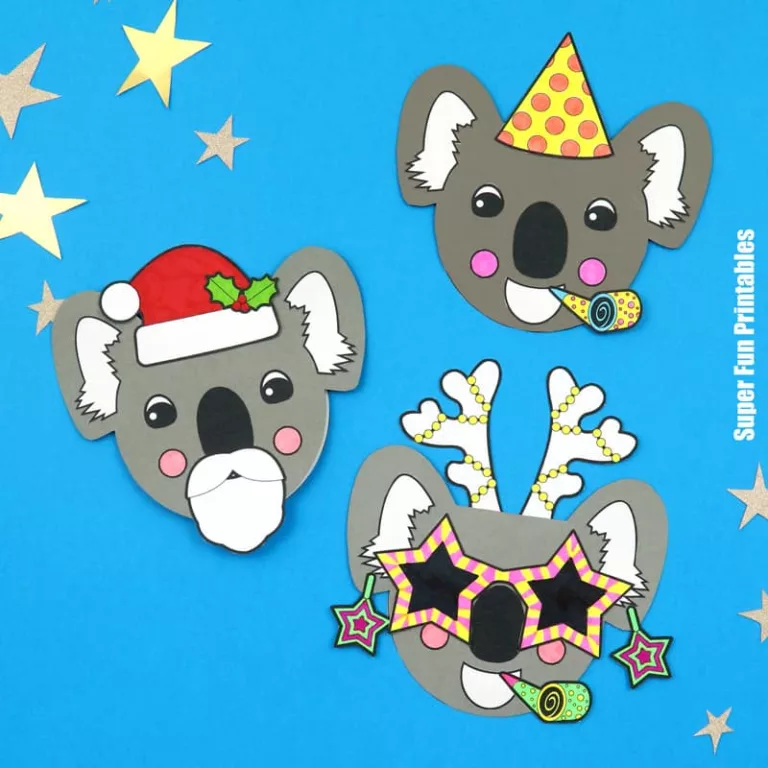
More DIY gifts kids can make
- Here’s a super cute washcloth snowman
- Make a yummy reindeer treat cup
- These Santa and Reindeer baskets are cute and easy to make
More Christmas Printables