Here’s a quirky but simple art idea you probably haven’t tried yet—Lint Roller Painting!
Like all process art, lint roller painting is a fun way to experiment just for the fun of it.
You might also like our Flower Scrape Art
Let’s take a second to appreciate one of the coolest inventions of the 20th Century.
Lint rollers are wonderful things, especially if you wear black leggings and have a shedding dog or cat. They’re super sticky and when you roll them up your leg they grab ALL the fluff and little hairs, just like magic. Then you can head out to the gym pet-hair free!
Being the owner of a non-shedding schnoodle, we never had a need for lint rollers in our house so I didn’t know anything about them. Then we adopted a 10-year-old, very hairy dog into the family and I quickly discovered how awesome these things are. They’re soooo sticky.
The best thing is, once the surface is covered in so much fluff it no longer picks up any more hair, you peel it off to reveal a brand new, super sticky layer beneath.
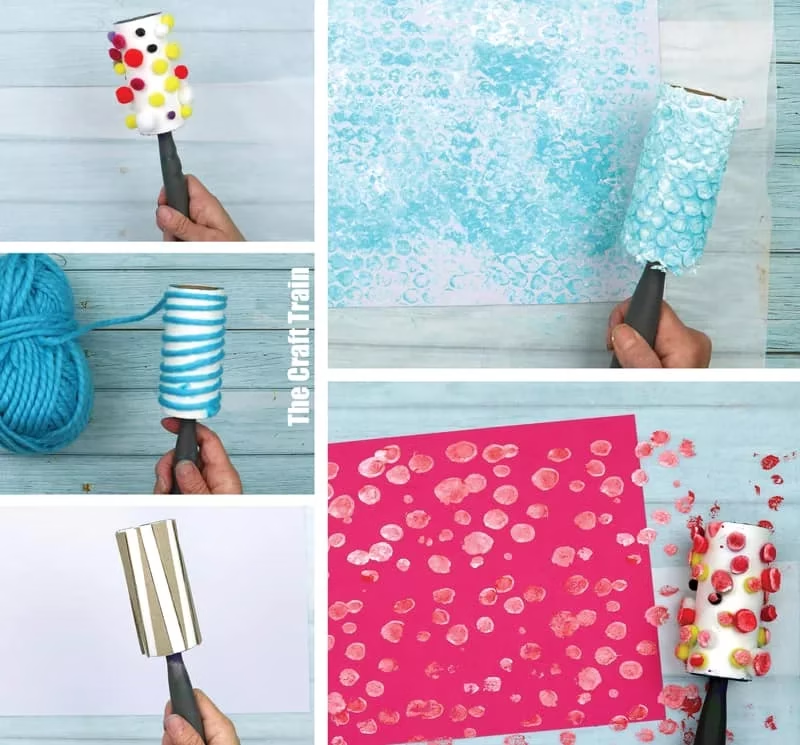
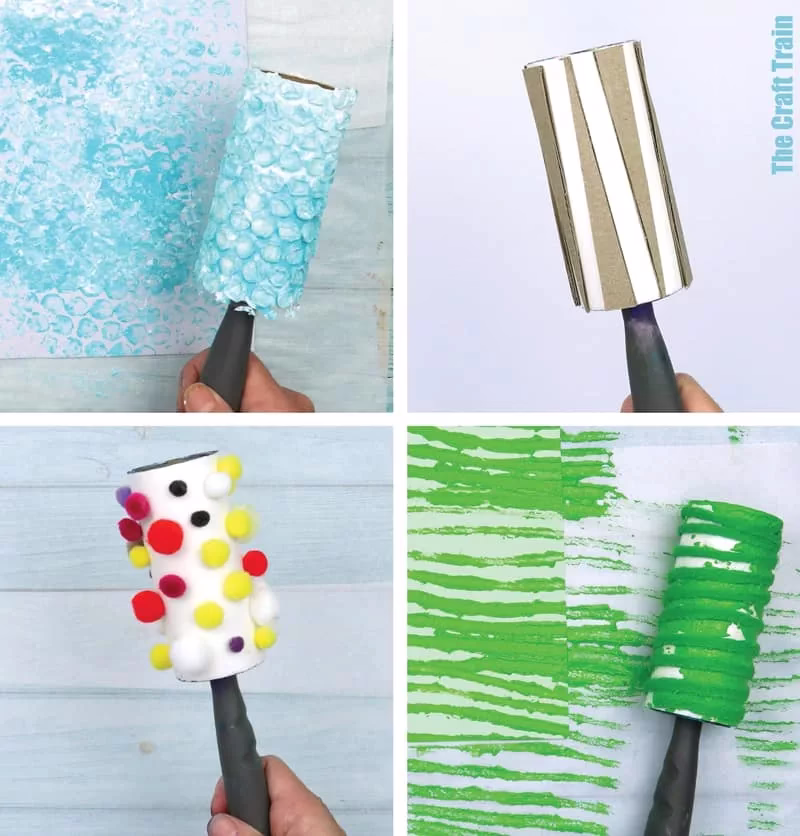
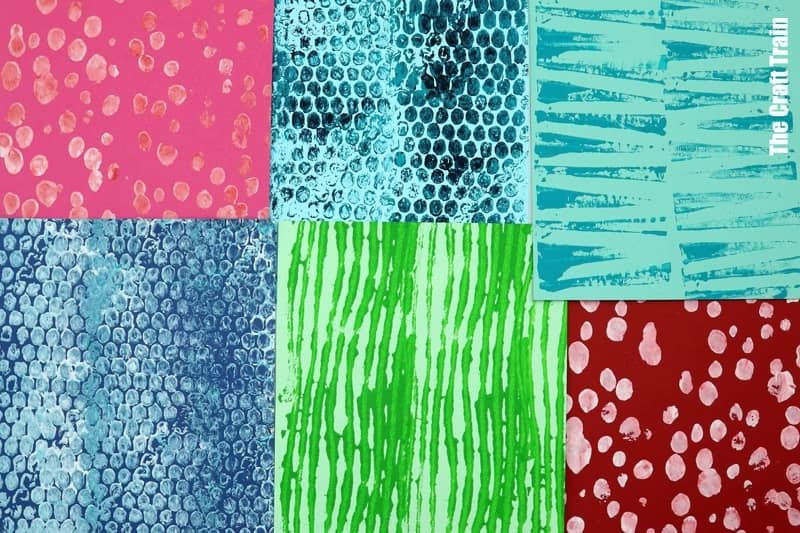
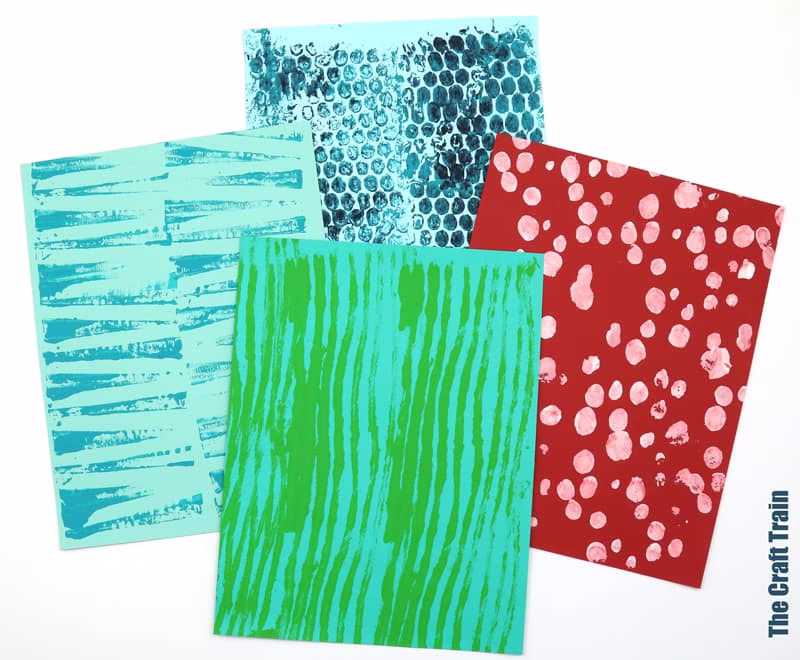
But fluff isn’t the only thing the lint rollers pick up. Their stickiness adheres to any light object. Yarn, pom poms, cardboard, bubble wrap, you name it. This and the spindle handle make lint rollers a perfect base to create a DIY textured paint roller.
So let’s get started on some lint roller process art …
How to do Lint Roller Painting
You will need
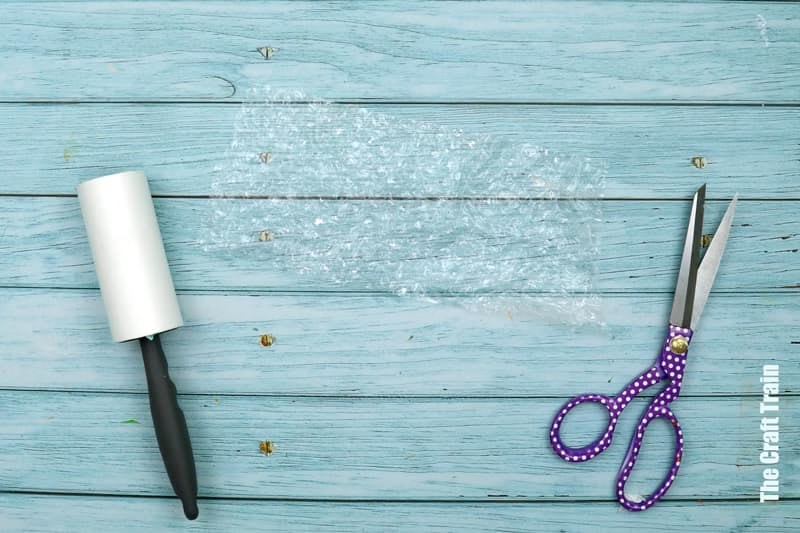
- A lint roller
- Acrylic paint
- Art paper
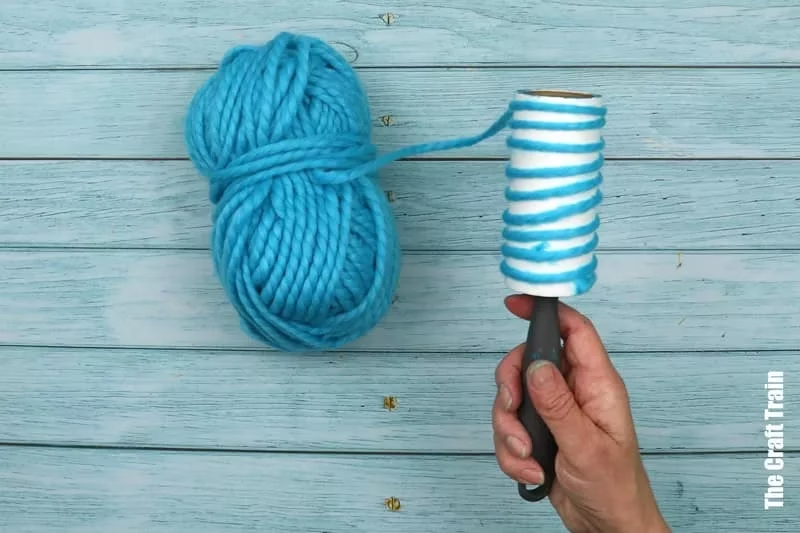
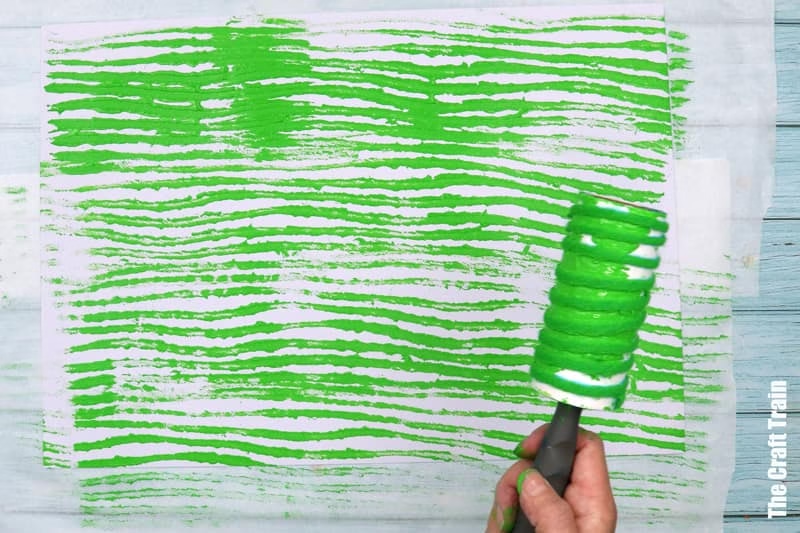
- Small, light items to stick to the lint roller’s surface that will create a texture, eg: bubble wrap scraps, chunky yarn, small pom poms, recycled cardboard (feel free to experiment with more ideas)
How to:
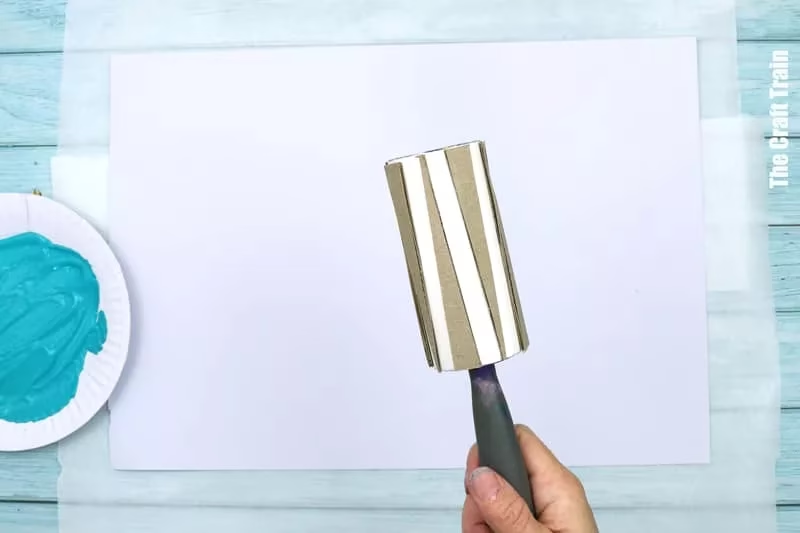
- Stick the texture item to the lint roller’s surface.
- Roll it in paint.
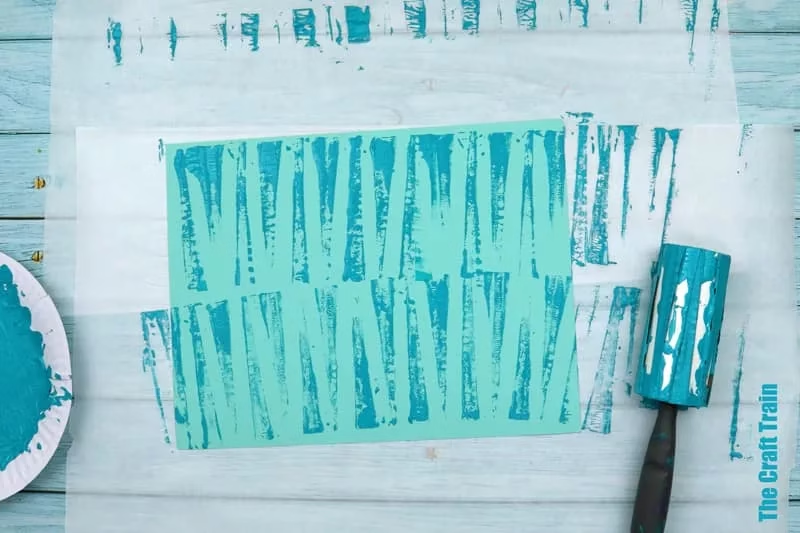
- Roll it across the paper.
- When done, peel the layer off and try a new one (this part can get messy).
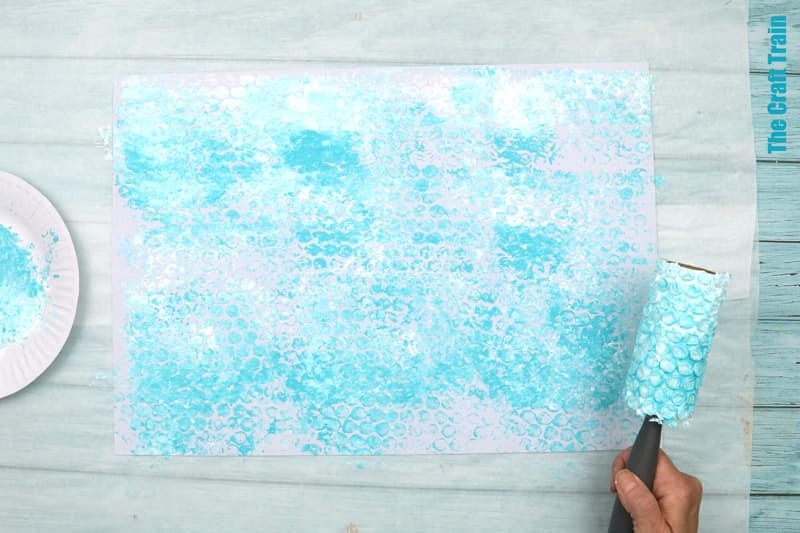
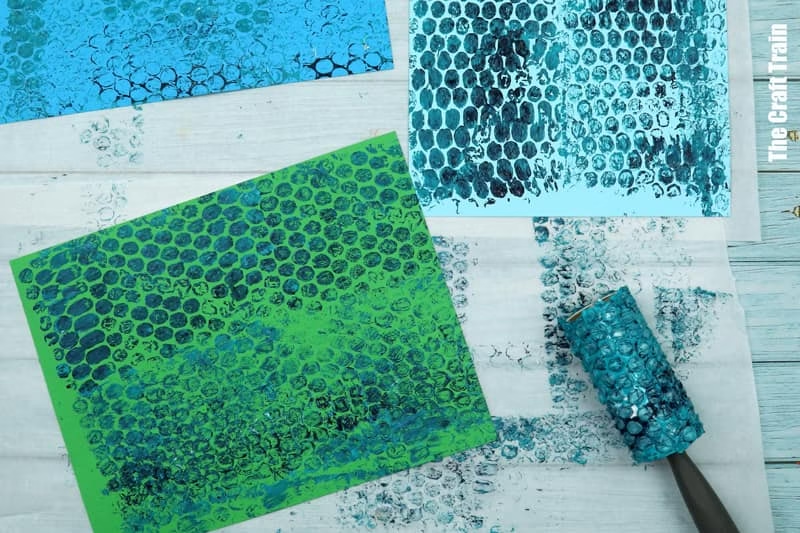
Peeling the bubble wrap layer off is a bit tricky because it sticks extremely well to the roller, so an adult will need to do this step. The other textures were easier to remove.
 ‘
‘
I wasn’t actually sure if pom poms would work, but they did!

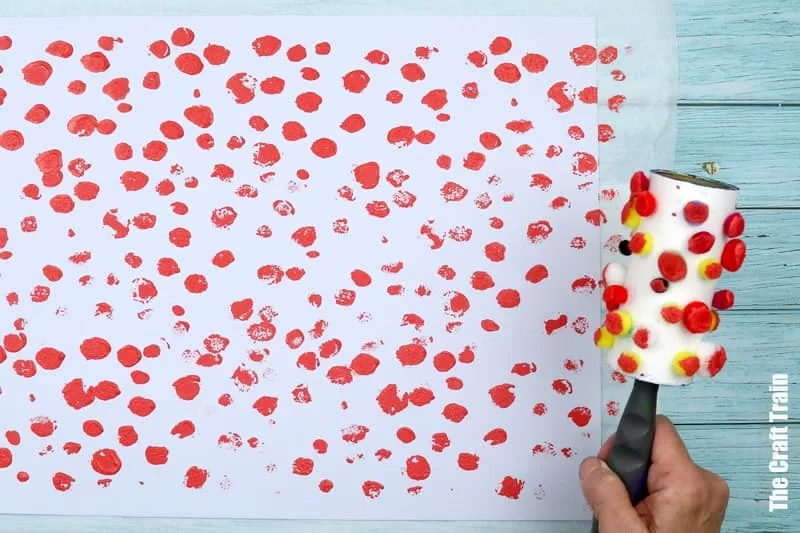
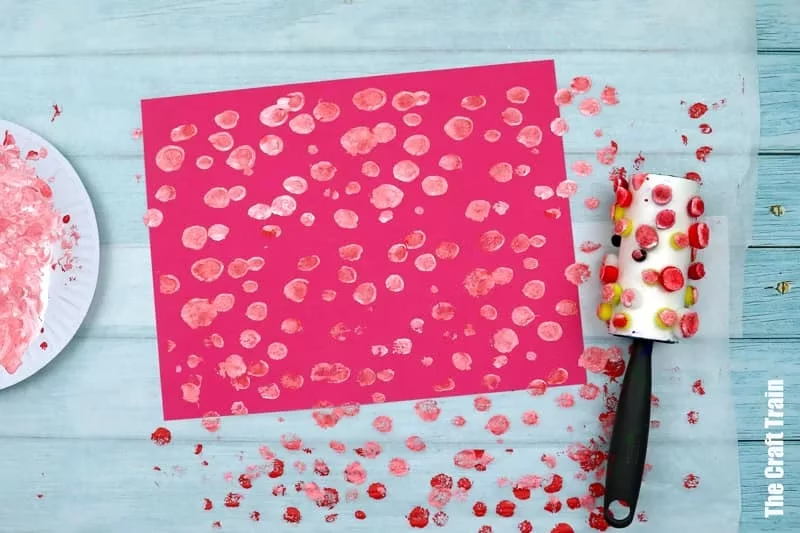
After a few prints were made, the pom poms did get a bit soggy and started falling off—which meant time for a new layer.
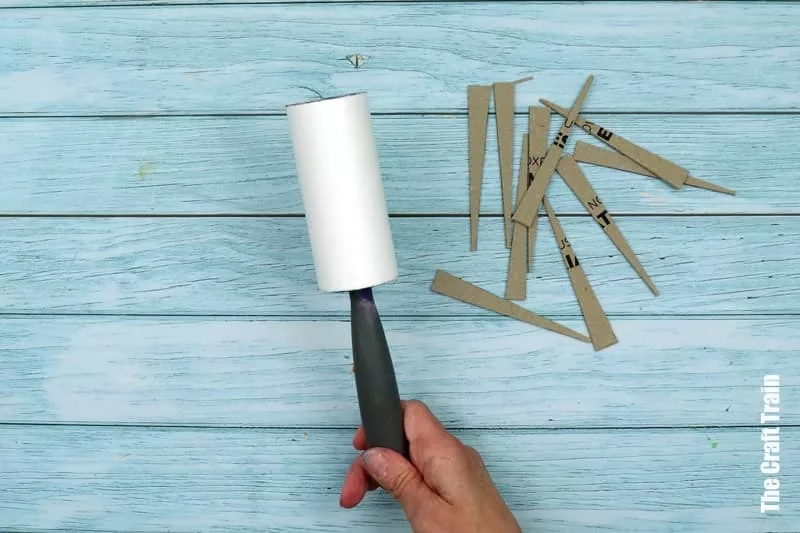
The recycled cardboard roller is trickier to set up and will need to be made by an adult. I cut a cardboard scrap into identical-shaped triangles with a pen knife and cutting mat and stuck them on in a pattern. You could try any shape and combination.
I’m a crafter at heart, so I’m trying to decide what to make with all these textural prints …
What are you going to make with your lint roller?