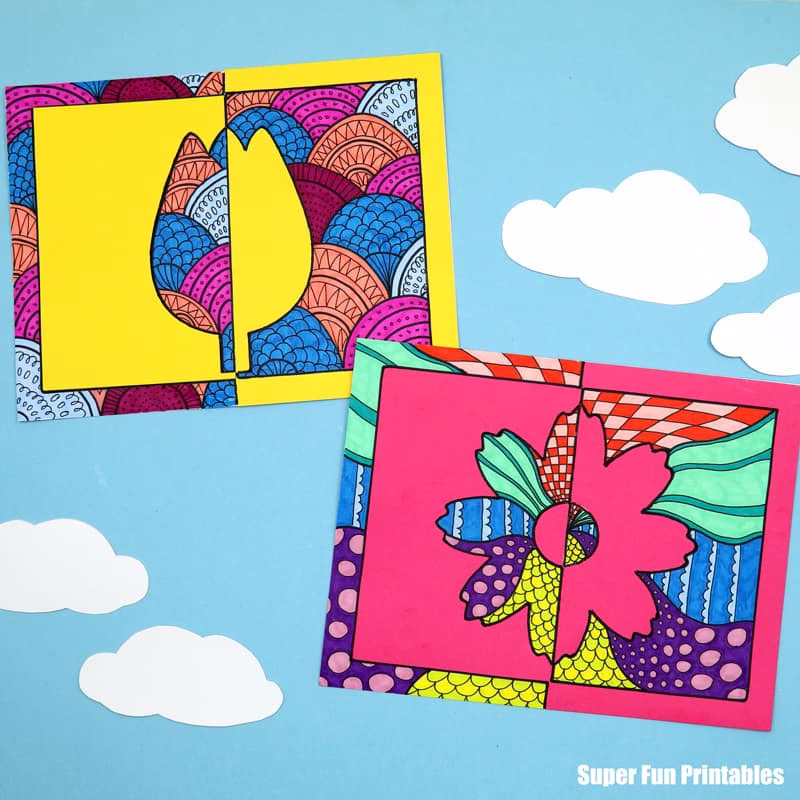
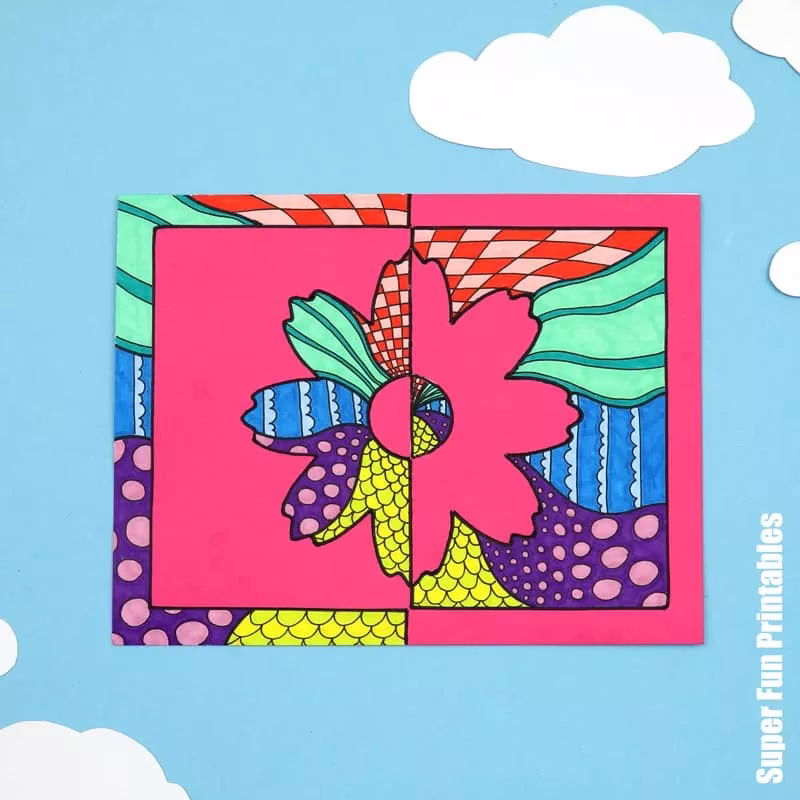
Flower Positive Negative Art is a fun way to explore positive/negative space using doodle art. This is a great Spring Art project for anyone aged 8 and up.
There are two flower designs to make, a cosmos and a tulip.
We’re on a flower art spree right now! Recently we’ve been sharing a series of big, bright scrape art flowers for younger kids.
Here’s something big kids, teens and adults are going to love.
Patterning is soothing and relaxing. It requires attention to detail along with plenty of patience—both qualities we ought to nurture in kids (and ourselves!). It also helps to calm anxious thoughts by taking us into ‘flow state’.
I always feel less anxious after creating doodle art projects to share.
This must be why I’m so drawn to them!
Here are over 40 Pattern Art Projects for Kids
Positive Negative Doodle Art Tips
- When creating your pattern in the white space, keep it continuous across both halves of the page.
- Choose colours that compliment the colour of your card stock
- Try thick marker for the main pattern, then add detail with fine-liners.
- If you need help coming up with doodle patterns, we have a printable doodle art swatch sheet that’s free to download
Card stock is recommended for this project but paper will also work. If you use permanent markers, be aware they will go through thin paper and stain the surface below.
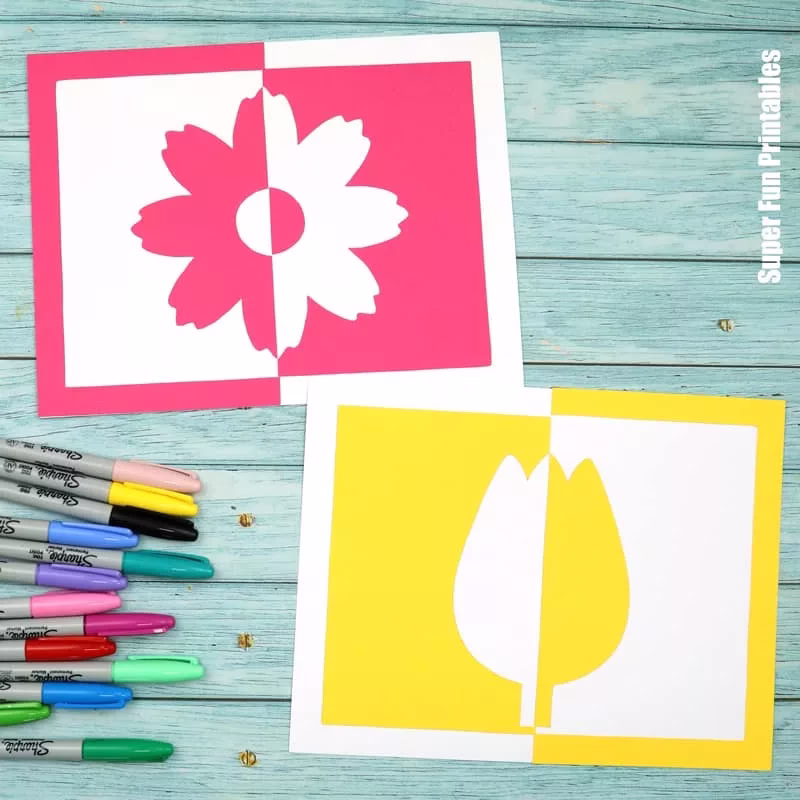
If working with a group of kids, you can use one flower template for every two students and cut them in half.
Are you ready to make some flower art?
How to Make Positive Negative Flower Art
You will need
- Card stock in white for the background
- Construction paper or card stock in a colour of your choice
- Markers for doodling. You can use permanent “Sharpie” markers or regular kid’s washable markers, plus optional fine-tipped pens for more detailed patterns
- Scissors
- Glue stick
- The Positive Negative Flower Art template, available in our printables store and TPT store
How to
Print either the tulip or cosmos flower to a sheet of coloured card stock.
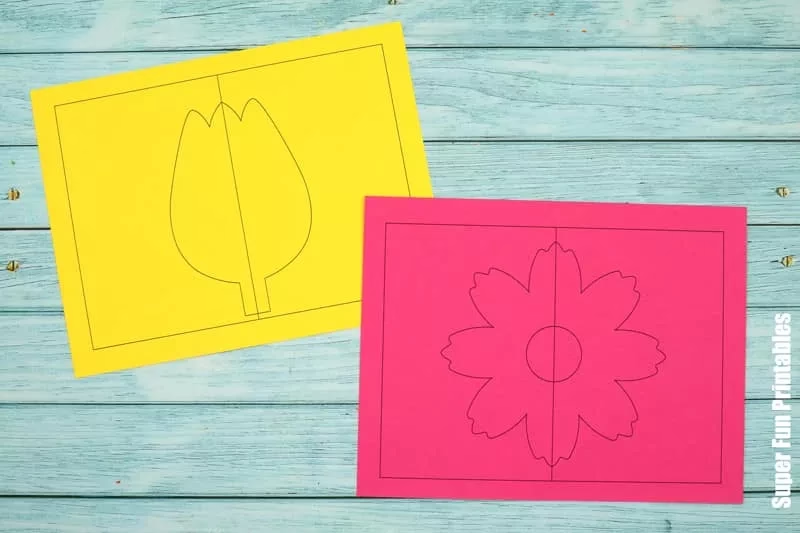
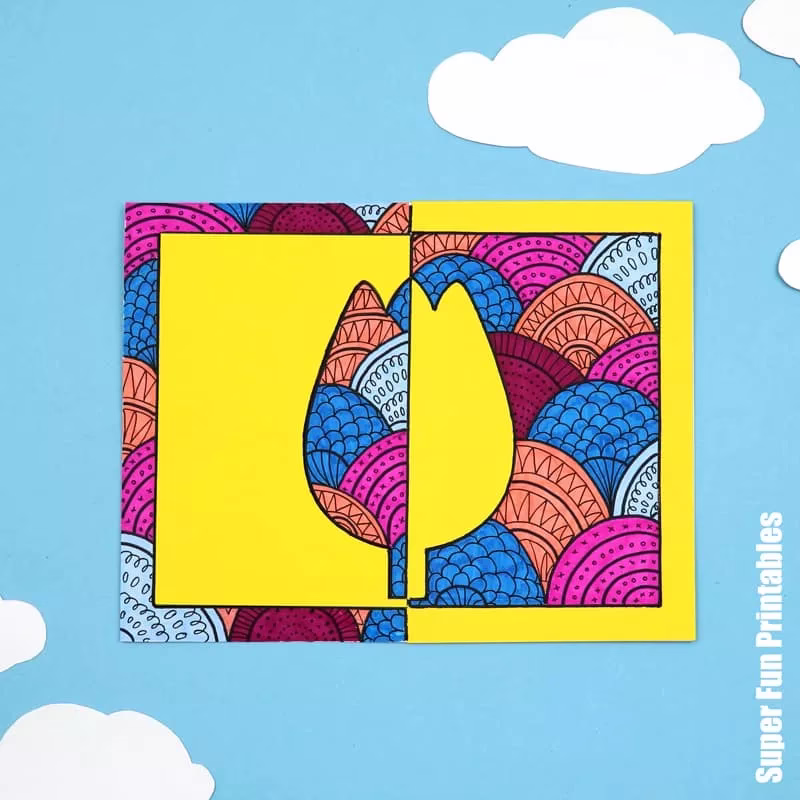
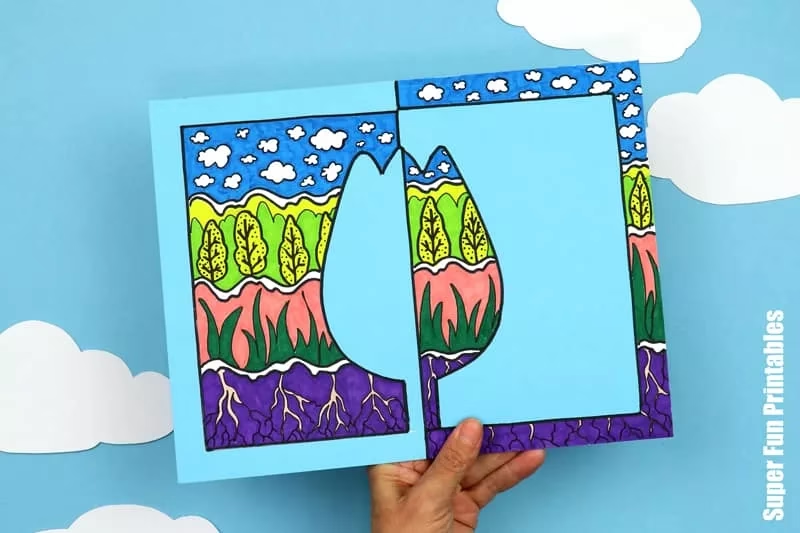
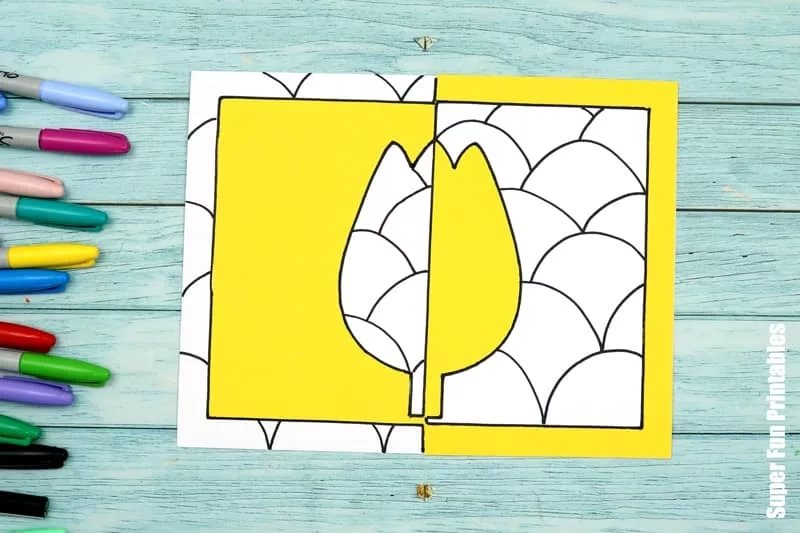
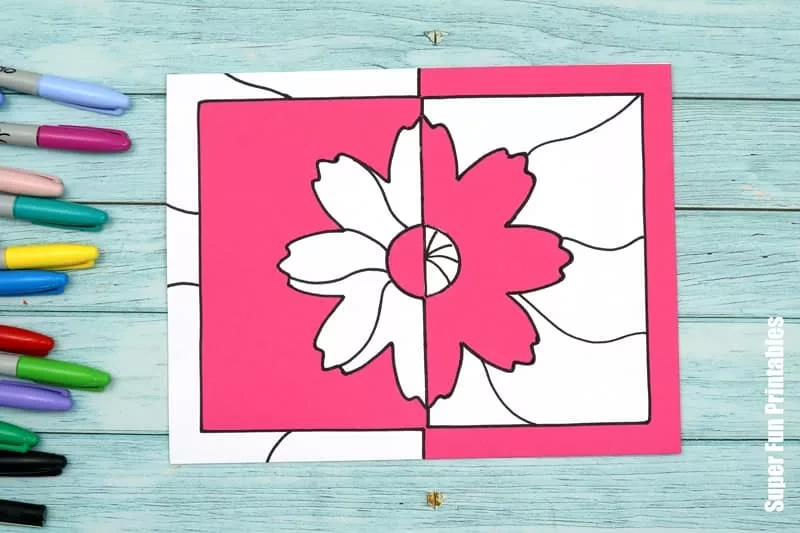
Cut the design in half along the line marked, then cut the shapes out.
Glue the shapes onto a white backing page in a positive/negative pattern as pictured with white space opposing the flower design pieces.
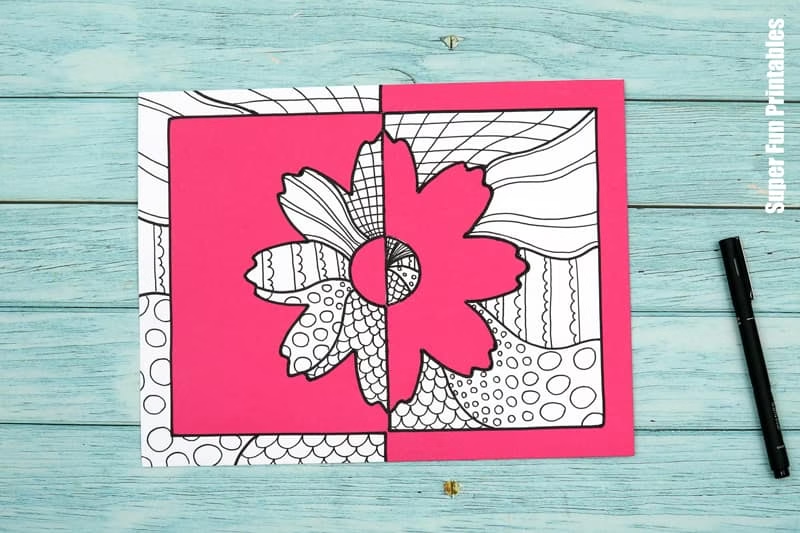
Use a black marker to outline the existing shapes, then draw your pattern into the white spaces.
Colour and add detail to the pattern. Optionally, add fine details using fine-tipped markers. This can be done either before or after you add the colour.
I love how these turned out!
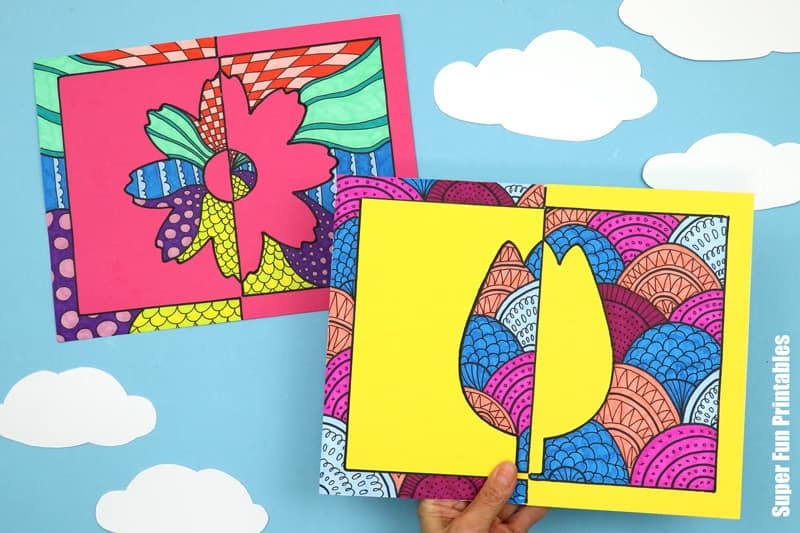
Now show your artwork off by hanging it on the wall!
More Pattern Art Projects
See all our pattern art projects here
Check out our Printable Doodle Art Collection