Create gorgeous Easter Positive Negative Art with doodle art patterns and our printable template.
This is a fun, creative Easter art idea for anyone aged 8+. You don’t need to be a kid—teens and adults love doodling too!
This project explores the concept of positive/negative space in a fun, hands-on way.
I LOVE Easter-themed projects, so I had to squeeze one more doodle art idea in before the long weekend arrives later this month!
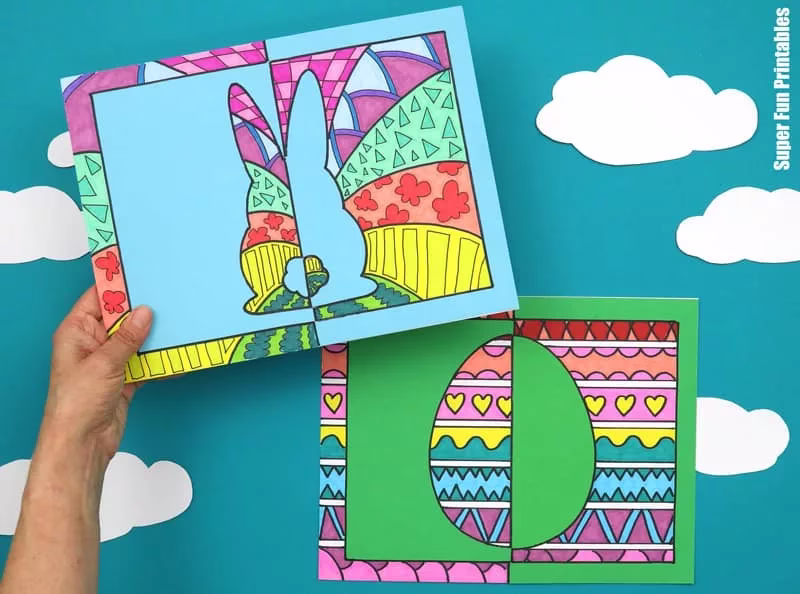
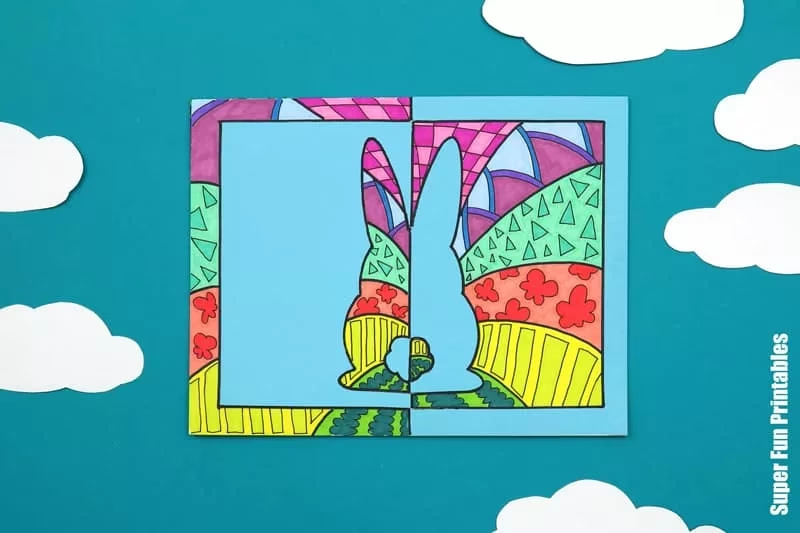
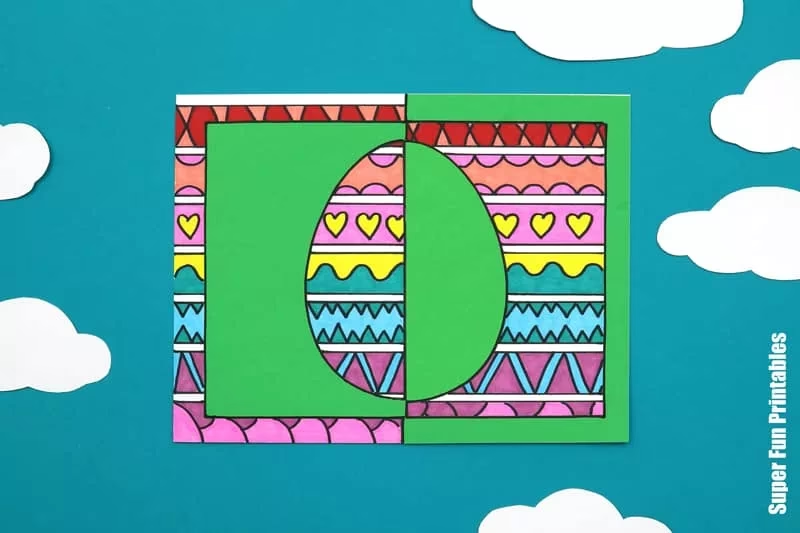
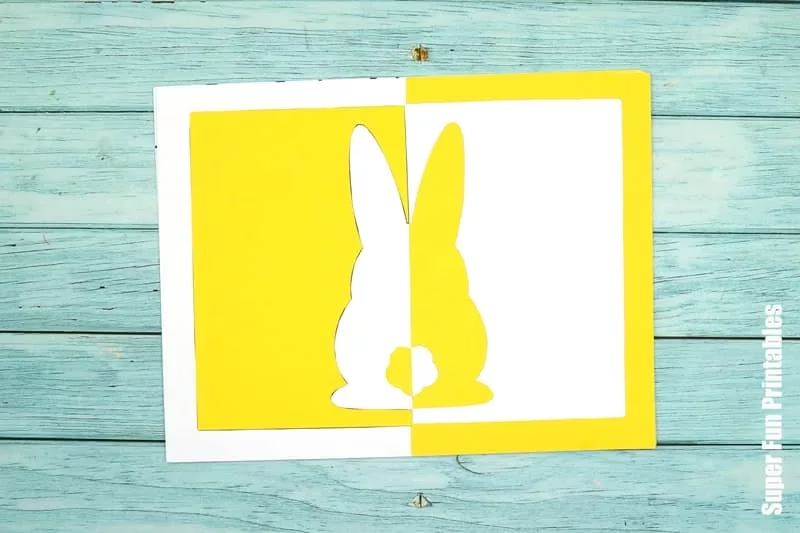
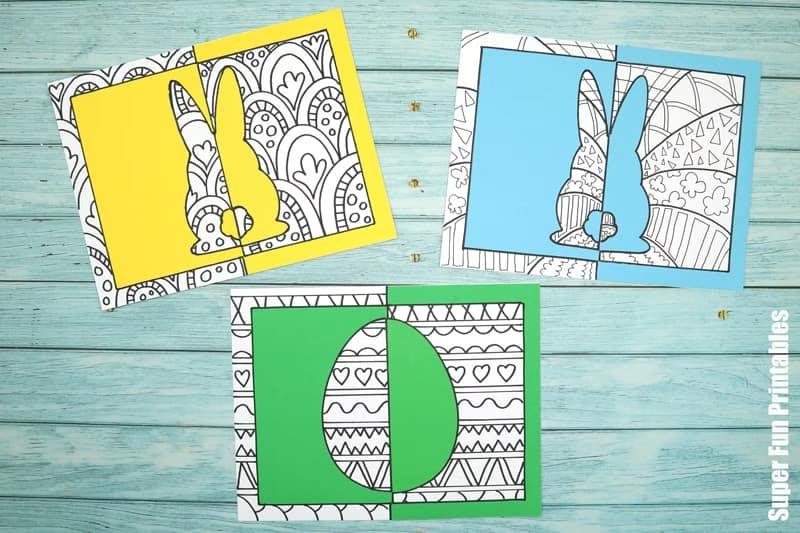
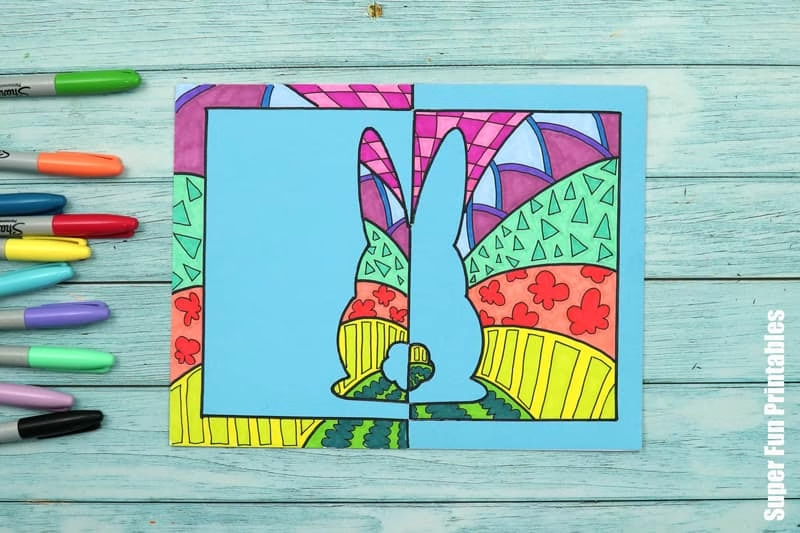
Easter Positive Negative Art is similar to the flower positive negative project we shared last month, only (you guessed it), the focus is eggs and bunnies.
Tips for making this project easier
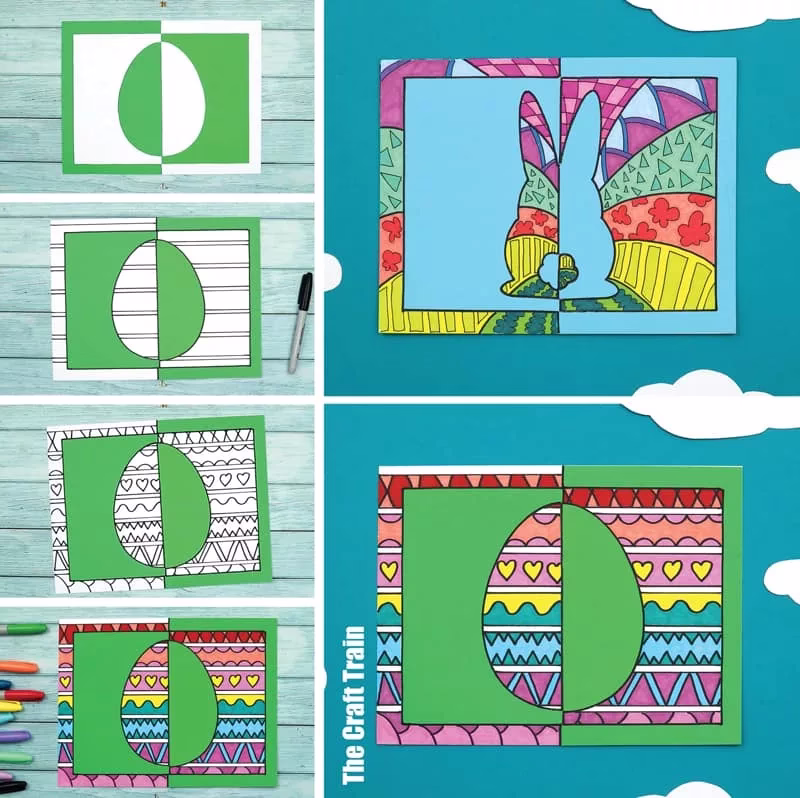
- Each design is split down the middle. To make positive/negative art more straightforward for younger kids, cut the design in half and only give them half the image to start with.
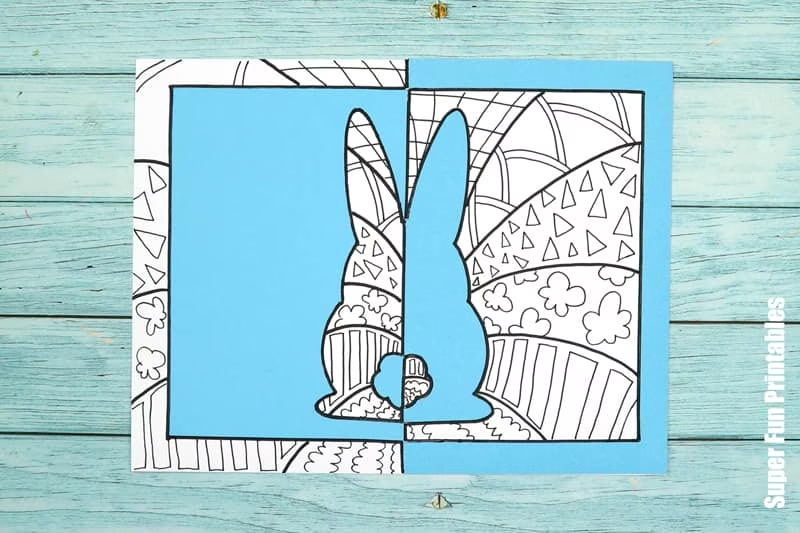
- Aim to keep your pattern continuous on both sides of the centreline for a more striking effect
- It might help to draw the framework in lead pencil before going over it in black marker
- Optionally, you can use a ruler to draw the base pattern art framework. This makes it easy to create a continuous pattern. I’ve done this with the egg design below.
Card stock is recommended for this project (especially if using permanent markers) but paper will also work.
Tweens, teens and adults can work into the design with fine-line pens to create more complex patterns. Younger kids are better off sticking with thick markers.
If working with a group use one template for every two students and cut them in half.
Here are over 40 Pattern Art Projects for Kids
Are you ready to get started?
How to make Easter Positive Negative Pattern Art
You Will Need
- Card stock in white for the background
- Construction paper or card stock in a colour of your choice
- Markers for doodling. You can use permanent “sharpie” markers or regular kids washable markers, plus optional fine-tipped pens for more detailed patterns
- Scissors
- Glue stick
- The Easter Positive Negative Art Template, available from our printables store and TPT store
How To
Print either the egg or bunny to a sheet of coloured card stock.
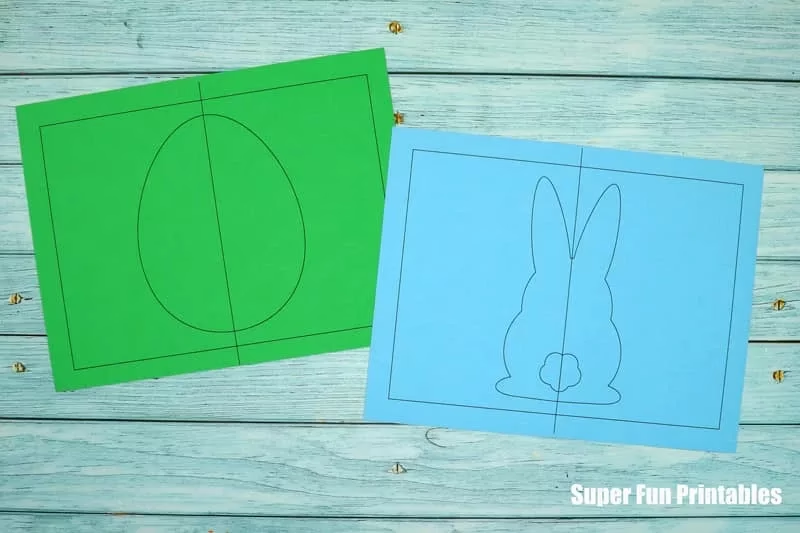
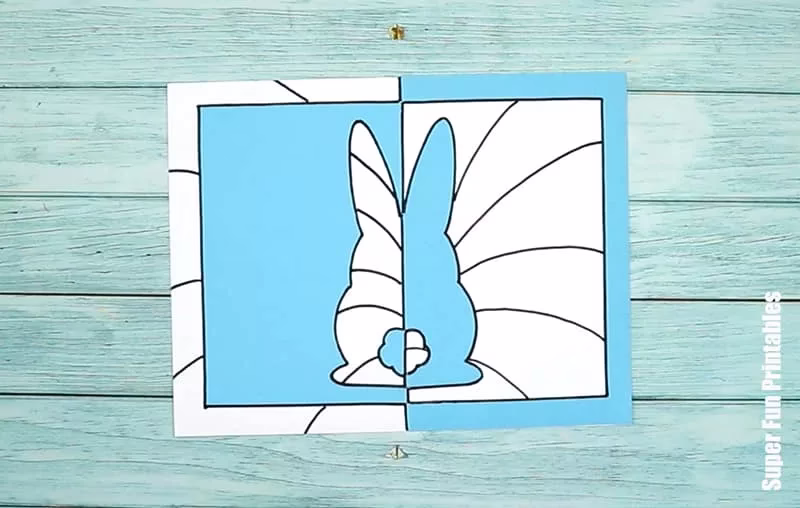
Cut the design in half along the line marked. Discard one half, then cut the shapes out.
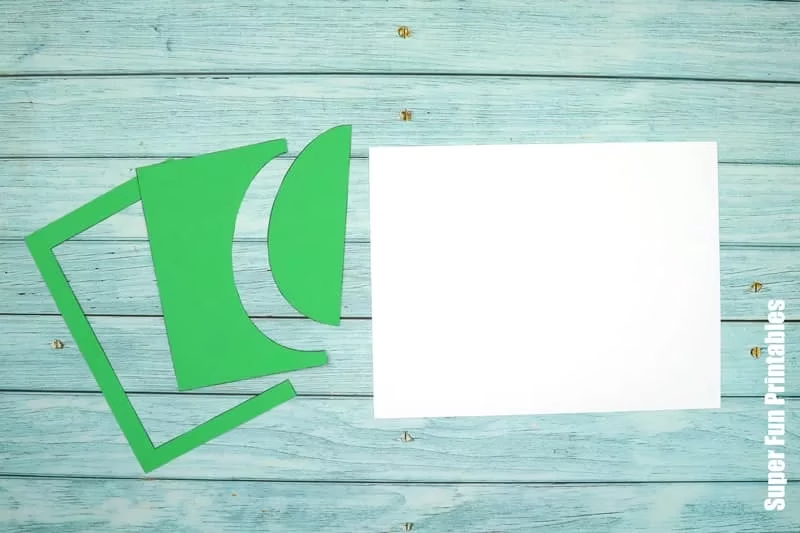
Glue the shapes on in a positive/negative pattern as pictured with white space opposing the card stock pieces.
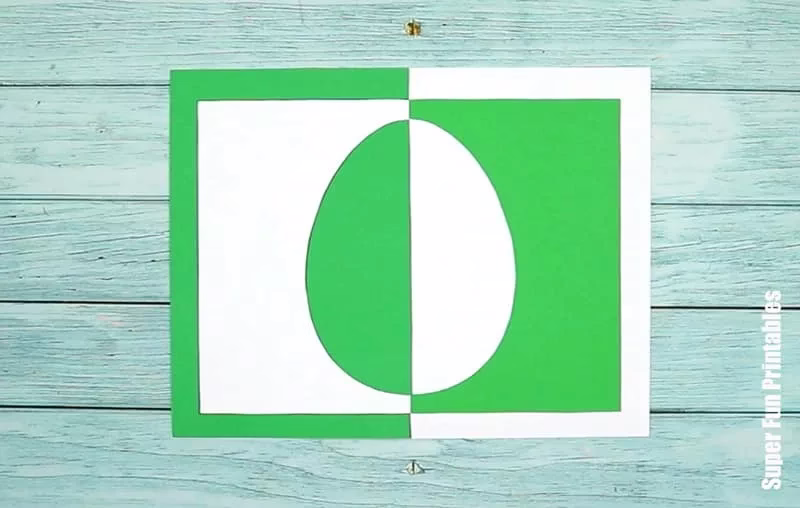
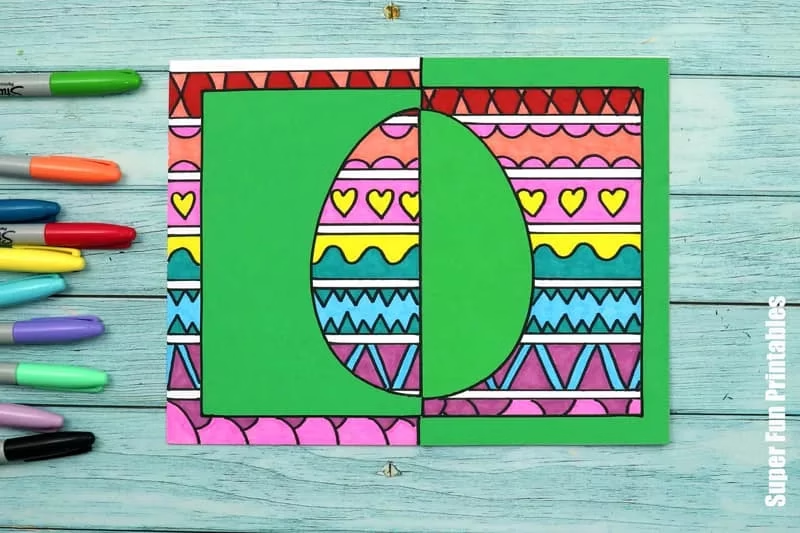
Use a black marker to outline the card stock pieces, then draw your pattern into the white spaces. It’s easiest to start with the ‘framework’ of your pattern. For example, straight lines (I’ve used a ruler for the egg pattern pictured), a starburst, a grid, or scallops/scales. These are just ideas for starters.
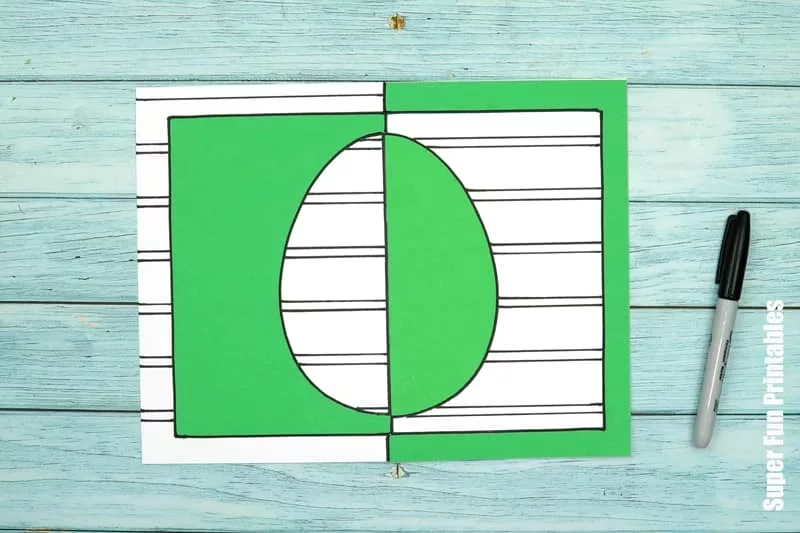
Add detail to the pattern. Optionally, use fine-tipped markers for this step.
Colour the pattern.
Now hang it on your wall to decorate for Easter!
See all our pattern art activities here
Doodle Art Projects for All Seasons