
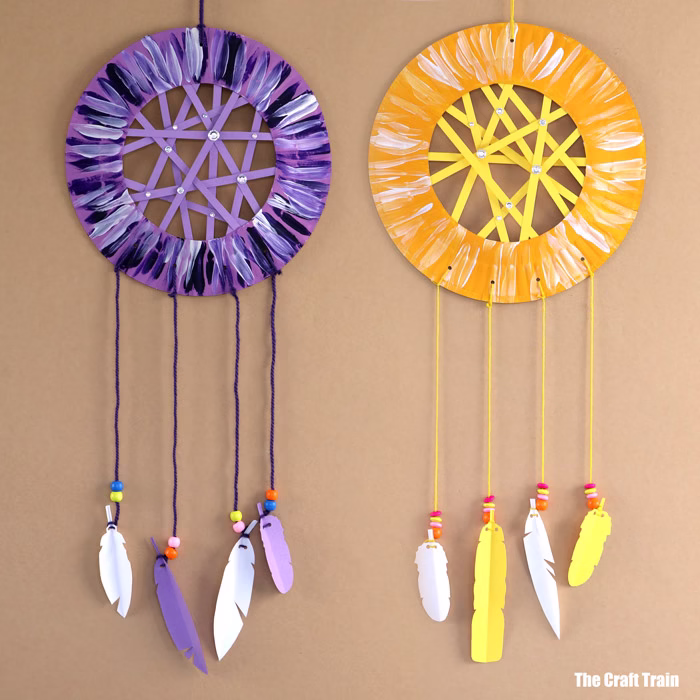
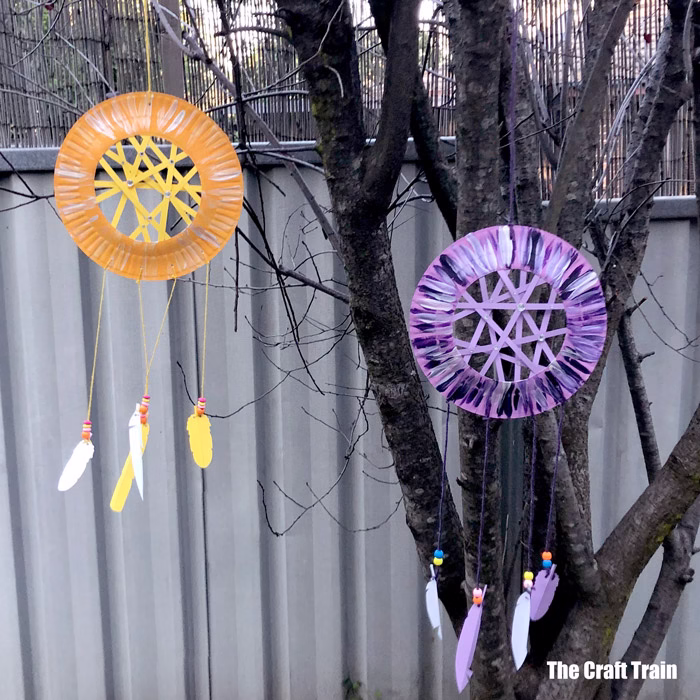
Today we’re showing you how to make a paper plate dream catcher.
This is a fun papercraft we’ve shared before, back when my girls were preschoolers. This version has been updated to include a template with paper strips and feathers for easy cutting out. You can see the original dreamcatchers my kids made here.
You might also like our God’s Eye weaving craft
Dream catchers are super popular in the crafting community. Their whimsical look and sweet name make them popular decorations for homes and kids’ bedrooms.
Traditionally though, dreamcatchers are a craft of the Native American people. You can read more about the spiritual origin and meaning here.
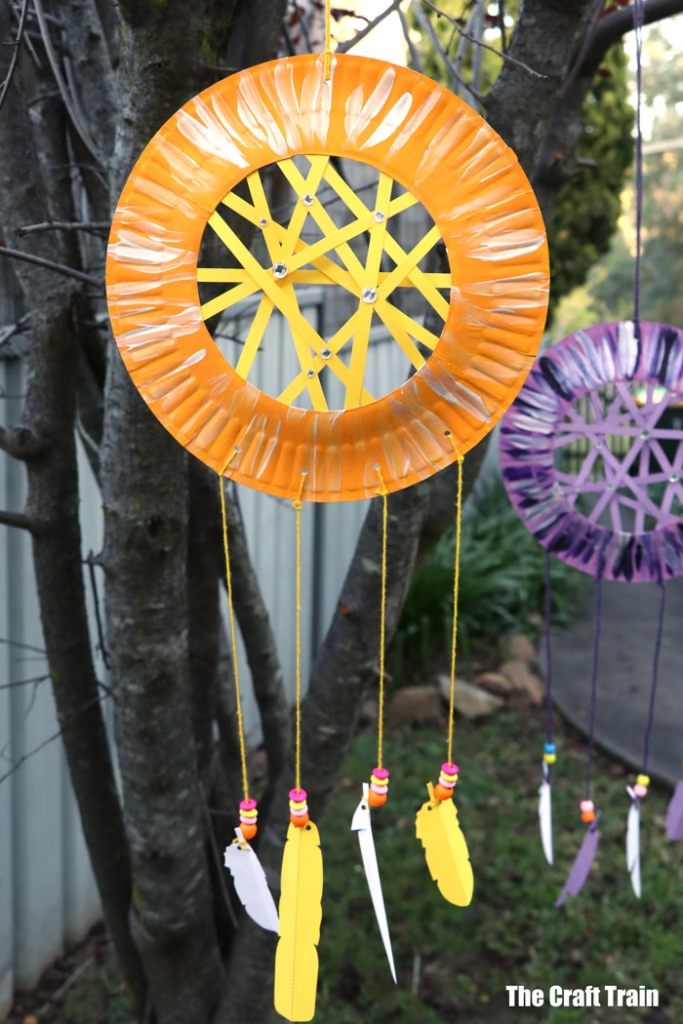
This paper plate version has been simplified for kids to make. They will love hanging them on their bedroom wall to catch the bad dreams in the paper web and and filter through the good ones. Snipping out the shapes and gluing them on is great fine motor practice too, they really are very easy to make.
How to make a paper plate dream catcher
You will need
- Paper plates
- Acrylic or poster paint
- Construction paper
- Yarn
- Glue stick
- Optional beads
- Optional plastic gem stickers to decorate
- Scissors
- Paintbrush
- Hole punch
Get the template
The Dreamcatcher template is free to download when you subscribe to our email address via the form below.
How to
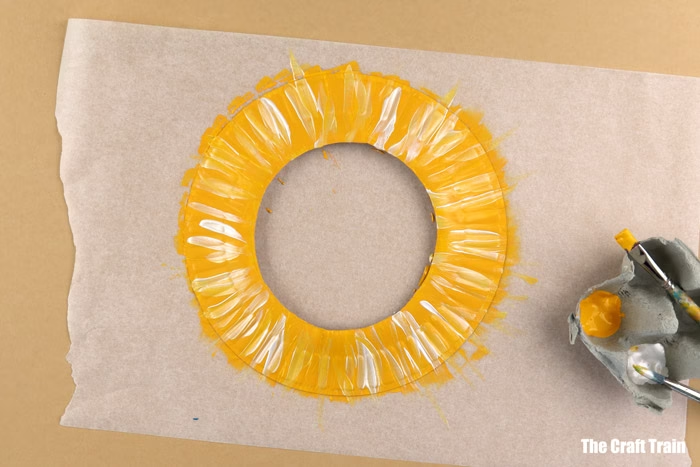
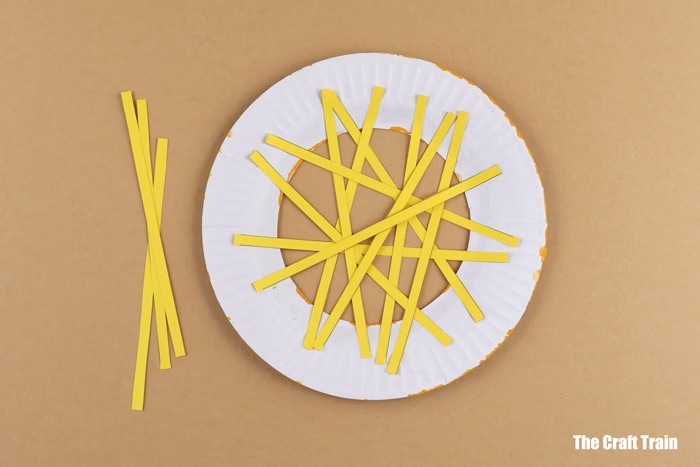
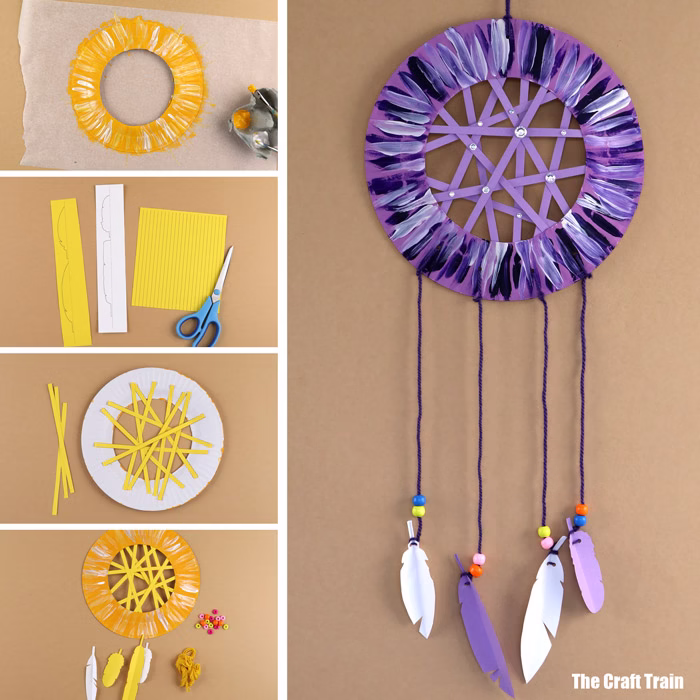
Fold your paper plate in half and cut the inner circle out to make your paper plate dream catcher frame.
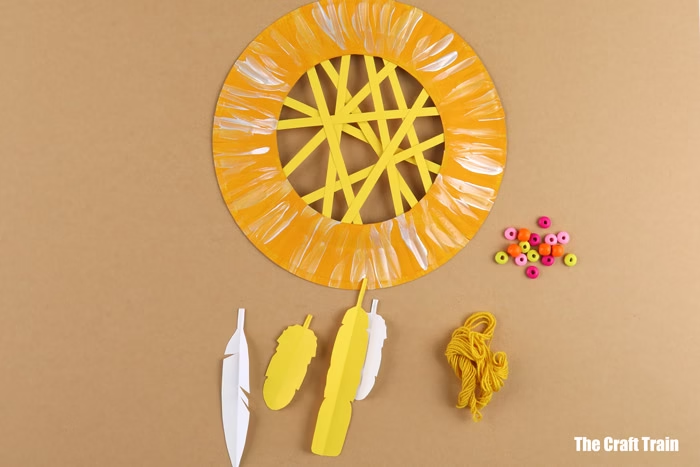
Lay it over a sheet of newspaper or nonstick paper and paint it to decorate.
Print the paper web and feathers out directly onto coloured construction paper. Alternatively you could use white paper and hand colour the feathers if you like. Cut out the strips (you won’t need all of them for a single dreamcatcher, one sheet of printed strips will make 2-3 dream catchers).
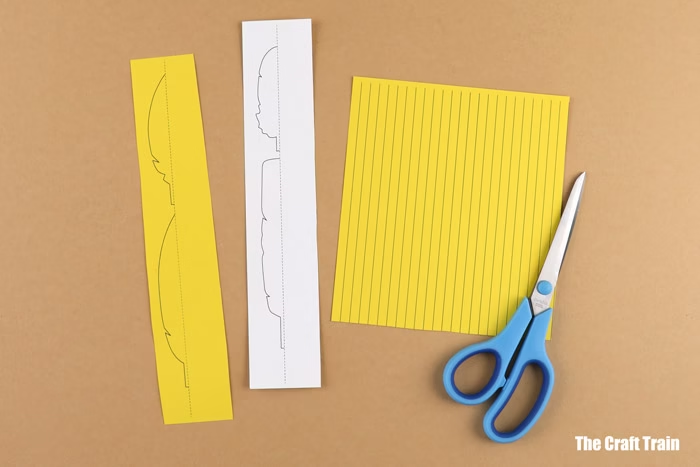
To make the paper feathers, fold along the dotted line and cut out the black line shapes. It’s recommended to score the fold lines first, but not essential. Once you’ve cut the feather out you can cut a couple of random V’s in the edge to give it a more authentic feather look.
Glue the strips into place by placing glue all around the inner ring and laying the strips over it. Kids could create a pattern with them if they like but I’ve glued them on in a hap-hazard sort of way with no pattern.
Punch four holes across the bottom of the paper plate, trying to keep them evenly spaced.
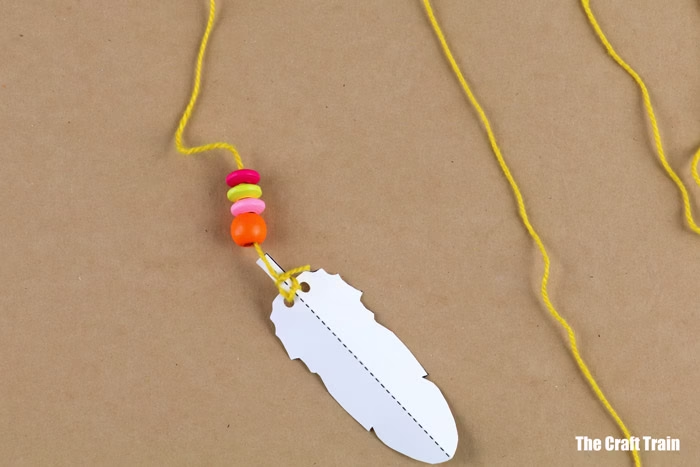
Tie yarn tails and thread a few beads onto the end.
Punch a hole in the paper feather and thread the yarn through to tie the feathers on. I’ve threaded the yarn through and then wrapped it around the feather stem once to keep the feather hanging straight.
Add a few plastic gem stickers, and punch another hole in the top. Thread sting through for hanging.
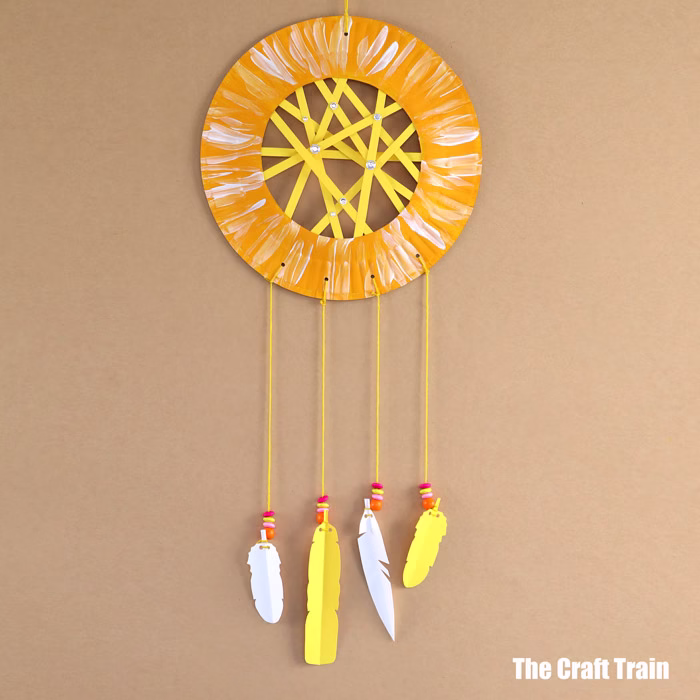
That’s all there is to it! If you wish to hang your dreamcatcher from the middle of the room, you could decorate a second paper plate on the inverse side. Glue this over the top of the paper strips to hide the messy back. If you’re hanging it on the wall, no need to bother.

Simple and easy!
Paper plate dream catcher

Simple paper plate dream catcher craft for kids
Materials
- Paper plates
- Acrylic or poster paint
- Construction paper
- Yarn
- Glue stick
- Optional beads
- Optional plastic gem stickers to decorate
- The free printable template
Tools
- Scissors
- Paintbrush
- Hole punch
Instructions
- Fold your paper plate in half and cut the inner circle out to make your paper plate dream catcher frame.
- Lay it over a sheet of newspaper or non stick paper and paint it to decorate.
- Print the paper web and feathers out directly onto coloured construction paper. Alternatively you could use white paper and hand colour the feathers if you like.
- Cut out the paper strips (you won’t need all of them for a single dreamcatcher, one sheet of printed strips will make 2-3 dream catchers).
- To make the paper feathers, fold along the dotted line and cut out the black line shapes. It’s recommended to score the fold lines first, but not essential. Once you’ve cut the feather out you can cut a couple of random V’s in the edge to give it a more authentic feather look.
- Glue the strips into place by placing glue all around the inner ring on the back of your plate and laying the strips over it. Kids could create a pattern with them if they like but I’ve glued them on in a hap-hazard sort of way with no pattern.
- Punch four holes across the bottom of the paper plate, trying to keep them evenly spaced.
- Tie yarn tails and thread a few beads onto the end.
- Punch a hole in the paper feather and thread the yarn through to tie the feathers on. I’ve threaded the yarn through and then wrapped it around the feather stem once to keep the feather hanging straight.
- Add a few plastic gem stickers, and punch another hole in the top. Thread sting through for hanging.
Notes
If you wish to hang your dreamcatcher from the middle of the room, you could paint a second paper plate on the inverse side. Glue this over the top of the paper strips to hide the messy back. If you’re hanging it against the wall, no need to bother.
You might also like
- Make a pom pom yarn hedgehog using our printable template
- These monster pegs are so colourful and fun!
- Kids will love making these woven yarn butterflies
- Create four different 3D cube bugs using our printable template
More Printable Summer Crafts


Your website is a treasure to me. I have a very good friend who has an autistic teen who loves doing crafts with me. Your patterns are much better than I could ever dream up!
Thank you so much for sharing and caring.
I’m so glad you find my website helpful, thank you
Capteur de rêve facile pour enfants